A step-by-step introduction to writing effective network fingerprinting and exploitation templates in Nuclei the easy way.
We recently introduced TCP Network protocol templating capabilities to nuclei. The most common question has been about how these network templates are created. In this post, we will take a look at how one can effectively create templates for TCP-based protocol by using a simple packet capturing utility.
There are two ways to create templates for network protocols -
- Black box packet analysis - This is the simpler way. We simply run the packet, capturing for a port and/or ip and use a real client to communicate with the server. This will be captured and it can be used to form similar requests.
- Specification - With this method, you simply read the protocol specification and try to figure out a valid request which can be used for Fingerprinting a series of requests to trigger some functionality like Authentication, etc. For simple text-based protocols like Memcached, Redis, etc., this is an easy process. However, Binary-based protocols like Mongo and Mysql may require in-depth code review to come up with the required Request/Response pairs.
We'll explore this and the Specification methods by examples from the nuclei-templates repository.
Black Box Template Creation Guide
Let's take a look at re-creating the MongoDB detection template using the black box method. We used a docker-compose file to setup the environment containing MongoDB locally. You can however, also use any pre-setup environments that have the software installed. (You may need to tweak your network interface using -iface option)
version: '3.1'

services:
  mongo:
    image: mongo
    restart: always
    ports:
      - 27017:27017
    environment:
      MONGO_INITDB_ROOT_USERNAME: root
      MONGO_INITDB_ROOT_PASSWORD: example
A docker-compose file for creating mongodb installation locally.
This tutorial assumes that you have Docker as well as docker-compose installed and working. If not, please see the instructions for your platform from https://docs.docker.com/engine/install/. Create a new file called docker-compose.yaml and run docker-compose up.
Get the network-fingerprint tool from Github. Installation instructions are available in the README. The first step is to have access to the target software somewhere. We've already done that by running the docker-compose up earlier in this blog.
For the next step, we need a client to transmit a message to the server and we will capture the communication. This can be done by either writing a custom script using client SDKs or using the provided command line tools for the Technology.
We've done this both ways, just to demonstrate. Below is a simple script in go, that when run will connect to MongoDB running on localhost:27017 port.
 262588213843476
You can also use mongodb-community-shell to do the same as this go script without code. You just need a client implementation to talk to the server, network-fingerprint will do the rest!
network-fingerprint is intended to capture packets for a specific destination port, inferring request response pairs depending who the packet is from, and displaying it nicely in json format. Hex as well as Plaintext variants are displayed. These requests can be directly/altered and used in templates as request while for response, matchers can be created based on found words or patterns in the response. All the interaction between the server and client can be captured and specific bits and pieces can be extracted based on educated guesses to achieve a template request.
We'll start by running network-fingerprint to capture traffic from port 27017 which is used by mongo-db on IP 127.0.0.1 (localhost). Start network-fingerprint in one shell and run the client in another. You can either use a custom client or a pre-made one For our case, we will run the go client we showed earlier using the below comamnd.
shell-1# network-fingerprint -port 27017
shell-2# go run main.go # optionally just run "mongo" if you have community shell
As soon as you enter this, traffic will start streaming in the network-fingerprint logs.
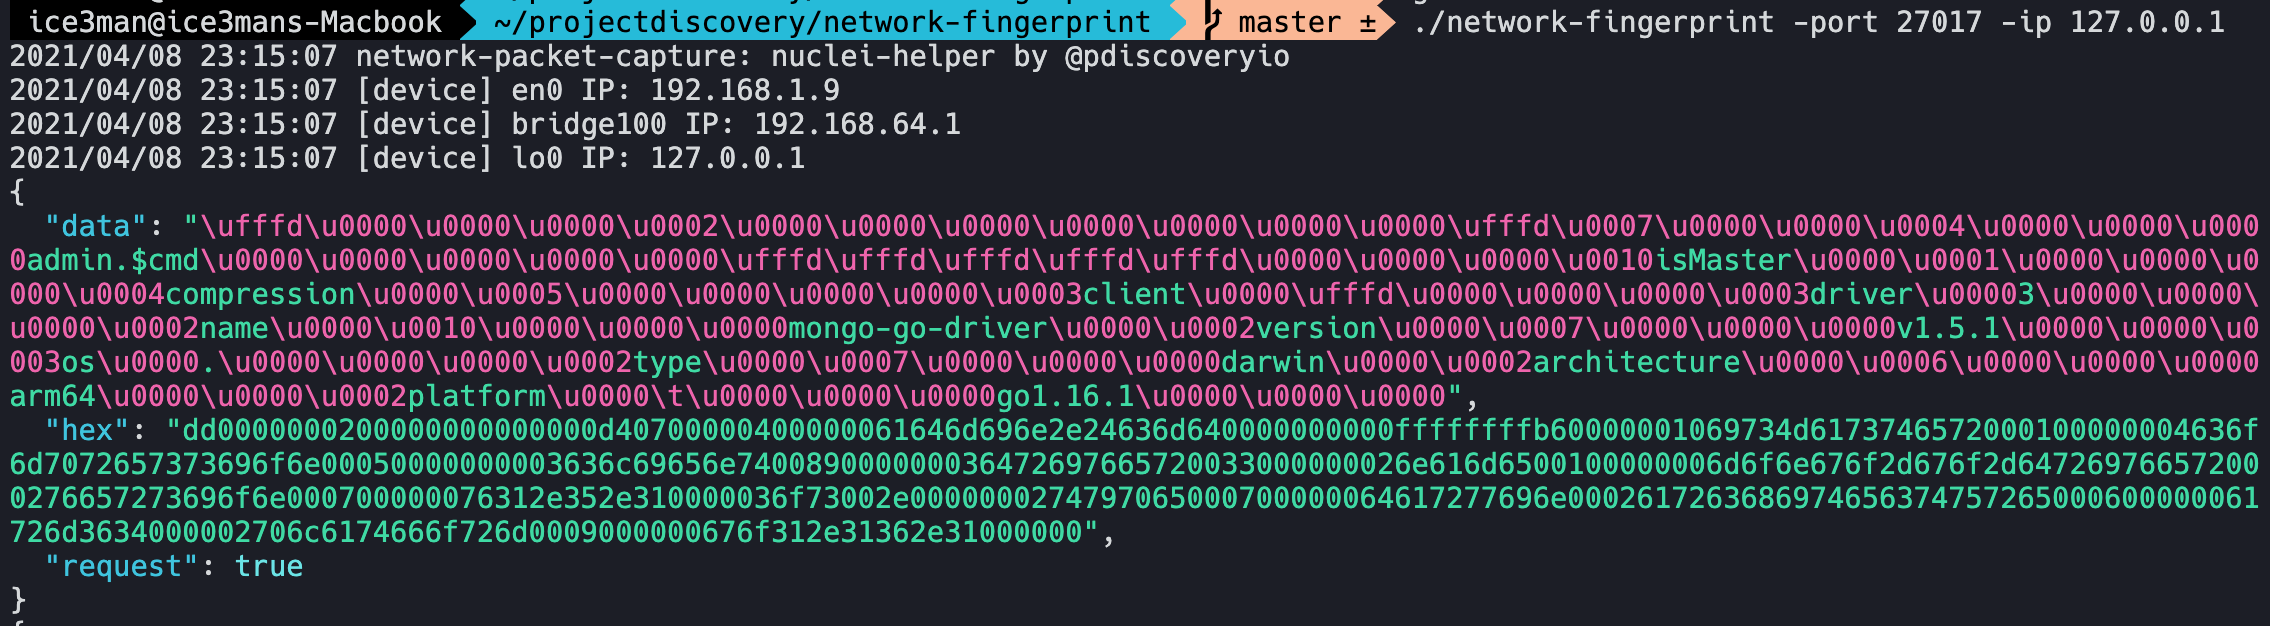
Now here comes the important part. As we can see, the first request is a very interesting one. It tries to identify itself saying mongo-db-driver and also versions etc. It also contains isMaster string that seems related to Mongodb.
To cheat around a bit and don't go all black box, always take a look at the docs if possible (this was found after searching "mongodb" + "isMaster")
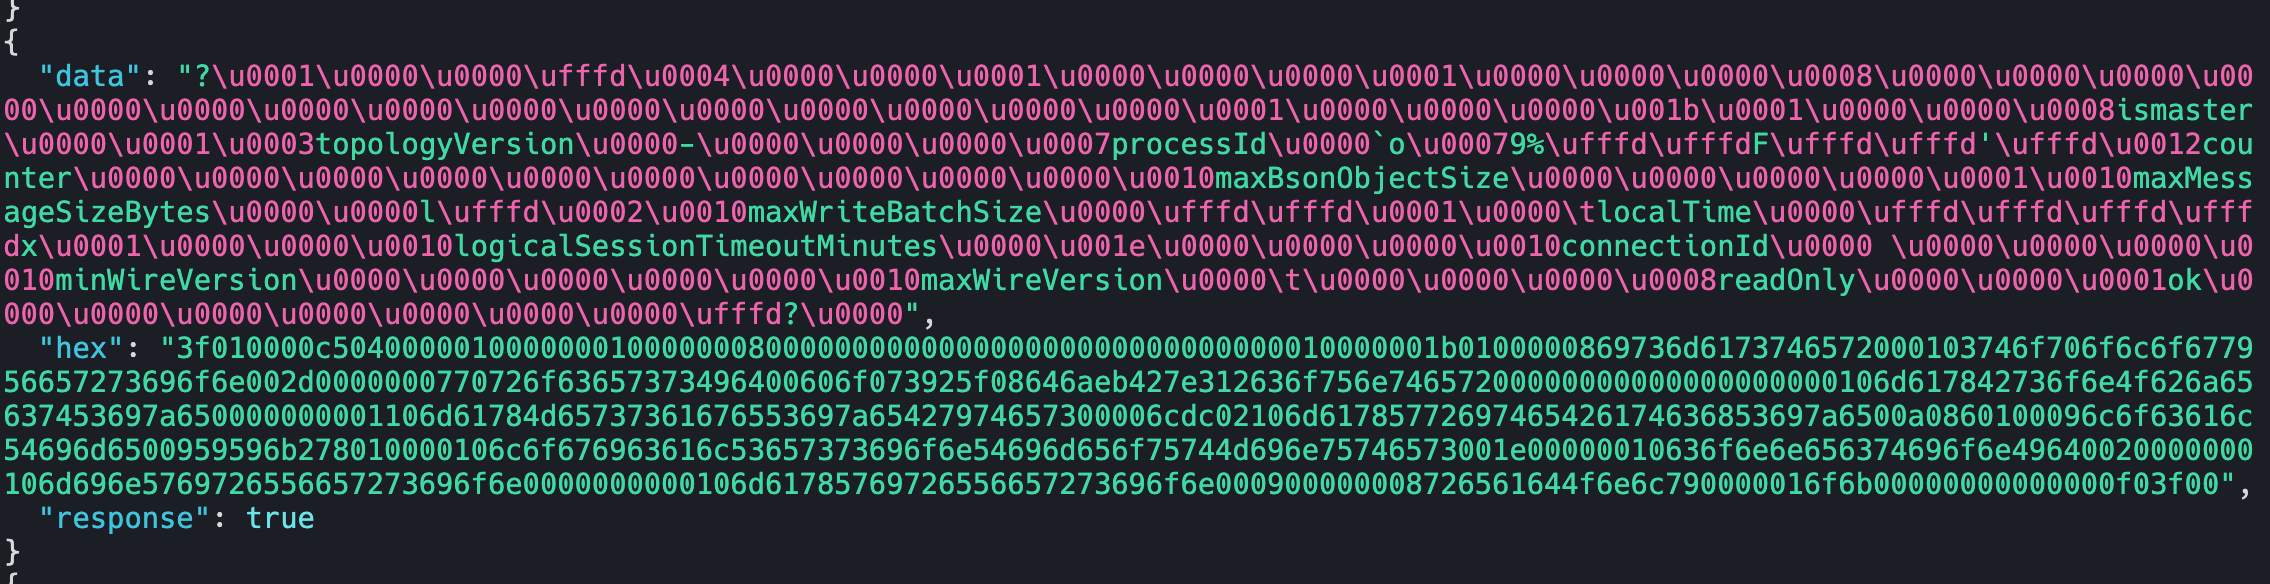
Since this request seems to be the handshake one, we can look for the next response. For black box fingerprinting, indepth knowledge of the protocol is not required. The next response contains some Text, that we can simply use in matchers.
id: mongodb-detect
info:
name: MongoDB Detection
author: pdteam
severity: info
tags: network,mongodb
network:
- inputs:
- data: dd0000000200000000000000d40700000400000061646d696e2e24636d640000000000ffffffffb60000001069734d6173746572000100000004636f6d7072657373696f6e00050000000003636c69656e740089000000036472697665720033000000026e616d6500100000006d6f6e676f2d676f2d647269766572000276657273696f6e000700000076312e352e310000036f73002e0000000274797065000700000064617277696e0002617263686974656374757265000600000061726d3634000002706c6174666f726d0009000000676f312e31362e31000000
type: hex
host:
- "{{Hostname}}"
- "{{Hostname}}:27017"
read-size: 2048
matchers:
- type: word
words:
- "logicalSessionTimeout"
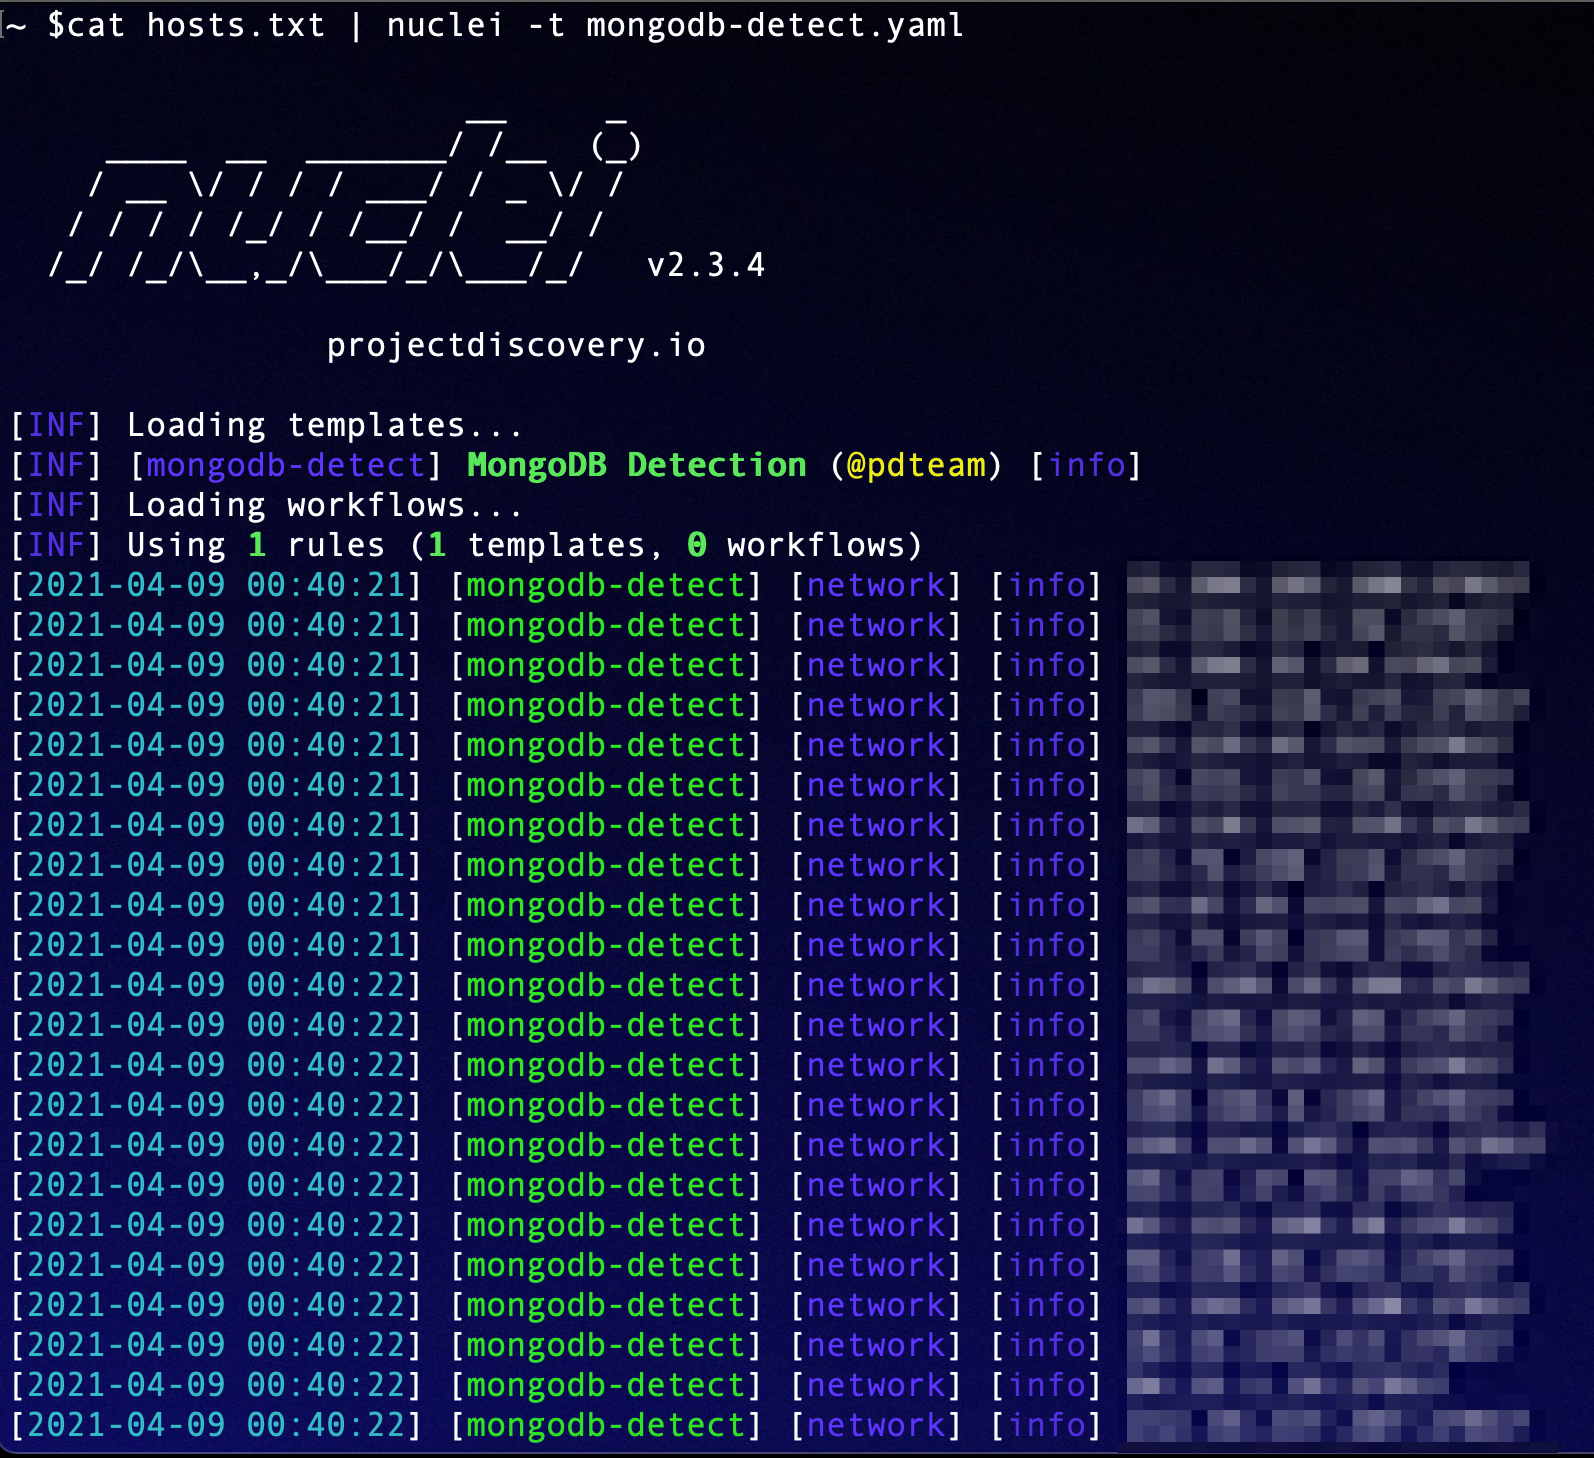
- "localTime"The above template is a complete example where we used two words found in the initial response "logicalSessionTimeout" and "localTime" to fingerprint MongoDB servers. We first send the earlier request in hex format, and check these words in the response using matchers.
Similar pattern generation can be done for other protocols as well. An example below shows network-fingerprint capturing FTP handshake that can be easily recreated by using nuclei-templates. This was done with a PureFTPd server running in docker and FileZilla OSX client.
For simple Fingerprinting needs, where you want to identify a running software, you can just take parts from the response if it returns a banner.
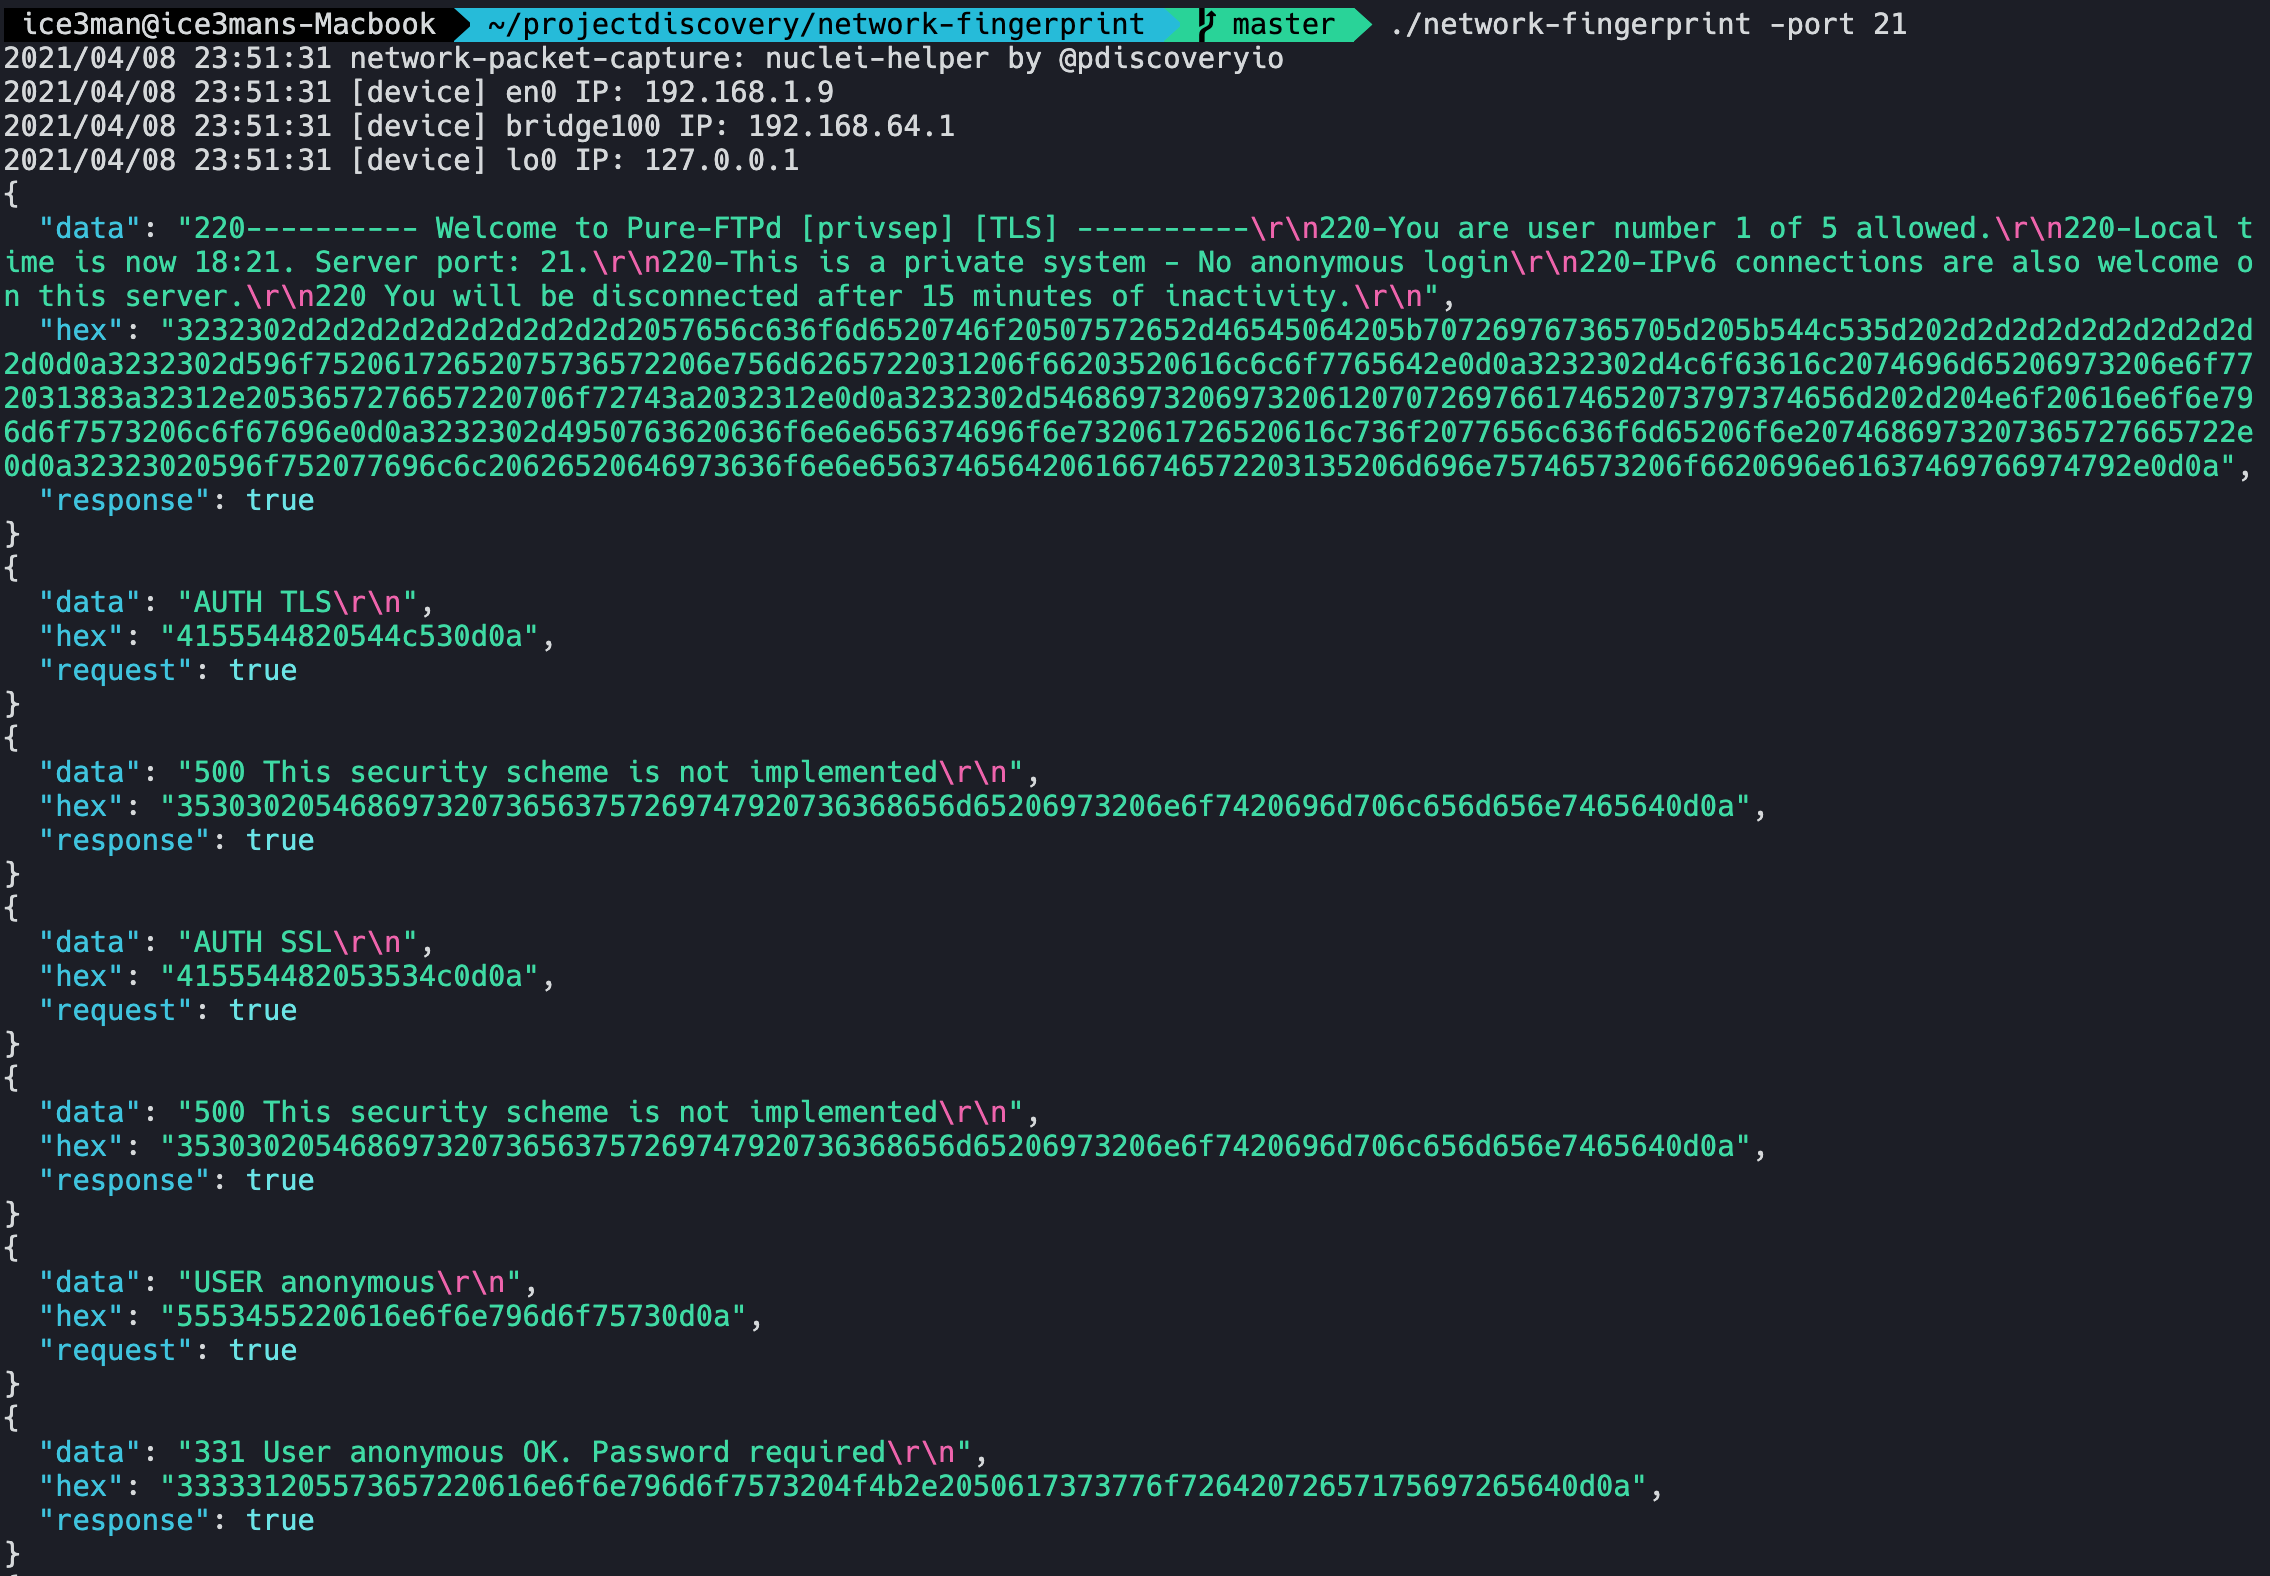
Just simply taking parts from the first response by the PureFTPd server is enough for us to create a template fingerprinting this technology.
matchers:
  - type: word
    words:
      - "Welcome to Pure-FTPd"
A Nuclei Matcher for Pure-FTPd Server
Also, network-fingerprint provides complete chain of messages, so you can even do complete handshakes by taking Input strings as well as output matchers.
Specification-based Network Templates
The next way to build network protocol templates is to just read their specification or code and try to build a picture of requests and responses accepted by a protocol.
As an example, Memcached has detailed docs on its wire protocol at https://github.com/memcached/memcached/blob/master/doc/protocol.txt. Just search for <technology> wire protocol and in most cases, you'll find relevant documentation for the technology.
As memached is a very simple text-based protocol, we can confirm detection by just finding a method that prints information unique to memcached. Reading ahead in the protocol, one such method is STATS which will display internal statistics of the memcached server, as shown below.
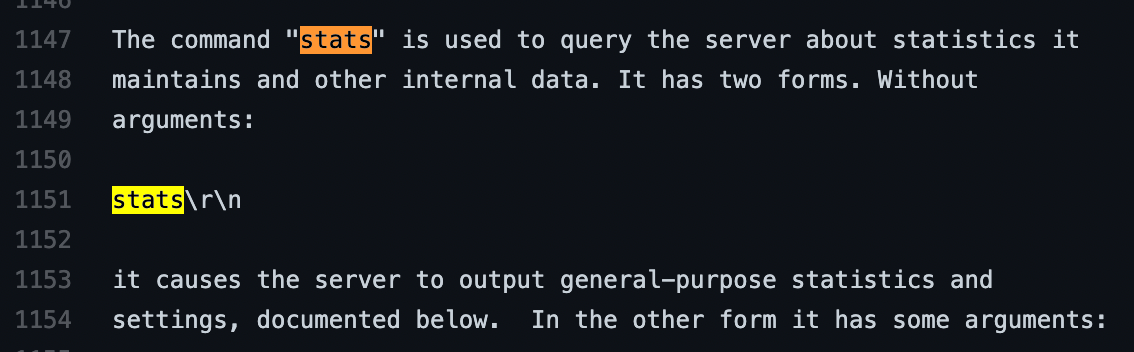
The specification also says that lines are terminated by \r\n and quit command can be used to close the connection manually after getting statistics. Armed with this knowledge of Memcached internals, we can create a nuclei template for detected Memcached statistics exposure.
id: memcached-stats

info:
  name: Memcached stats disclosure
  author: pdteam
  severity: low
  tags: network,memcached

network:
  - inputs:
      - data: "stats\r\nquit\r\n"
    host:
      - "{{Hostname}}"
      - "{{Hostname}}:11211"
    read-size: 2048
    matchers:
      - type: word
        words:
          - "STAT "
The template sends a STATS command and a QUIT command, reading 2048 bytes and seeing if the response is prefixed with STAT which is what the documentation says is the correct response.
Similarly, INFO command for Redis and other commands for other servers can be templated as well.
FAQs.
- Try to perform the same request multiple times and see the common things in multiple responses. This is the best way to get valid matchers that do not produce false-positives for a protocol.
- Dynamic Data can be present in requests and responses as well, so you should look out for them.