In this blog we’ll discuss the basics of proxies, explain what Proxify is and how it can be used.
You’ll learn how to:
- Install and run Proxify
- Customize proxy output files and addresses
- Use DSL language to match and/or replace requests/responses from CLI.
- Use Proxify to log all HTTP requests from Burp Suite or a web browser.
- Set up Proxify on a VPS to hide the true source of your traffic
But first, let's start by defining a proxy and what it can be used for.
What is a proxy server?
Fun fact: The word “proxy” goes waaaaay back. It’s derived from the Latin word “prōcūrō” which can be translated to:
- Prō - “On behalf of”
- Cūrō - “I care for”
In networking, a proxy server can be defined as:
“A server that acts as an intermediary between (a) a client requesting a resource and (b) a server providing that resource.”
I’ll help explain this with a little roleplay that you might be familiar with.
Take yourself back to the school playground. Your name is Bob and you're 10 years old and have a crush on Alice. You want to ask Alice if she’ll go out with you but her best friend Roxy is always with her. So you have to ask Roxy to ask her for you.

Roxy (the proxy) receives the request from Bob (client) and passes it onto Alice (server). Alice responds to Roxy and passes the response back to Bob.
What is Proxify?
Proxify is a CLI tool for proxying, capturing, and manipulating HTTP(S) traffic. Because it runs in the CLI and is written in Golang, it can easily be used on almost any device and is easily portable to remote servers without the need for a GUI.
How to install Proxify
You can download the ready to go binary or install it from the source using Go:
go install -v github.com/projectdiscovery/proxify/cmd/proxify@latest
Running Proxify
To first run Proxify you’ll need to locate the binary, if you installed from source using Go, it's most likely in ~/go/bin/proxify. I like to set up either a symlink or update my $PATH so I can just run proxify from anywhere.

When you run Proxify it starts a HTTP proxy listening on port 8888 and a SOCKS5 proxy listening on port 10080 as default. The default ports used don't clash with Burp Suite. Smart.
You can also see from the output that Proxify saves traffic to the logs folder created upon installation. This folder is where you can read all of your proxied requests/responses.
Getting Help
Run proxify -h to display all of the available switches.
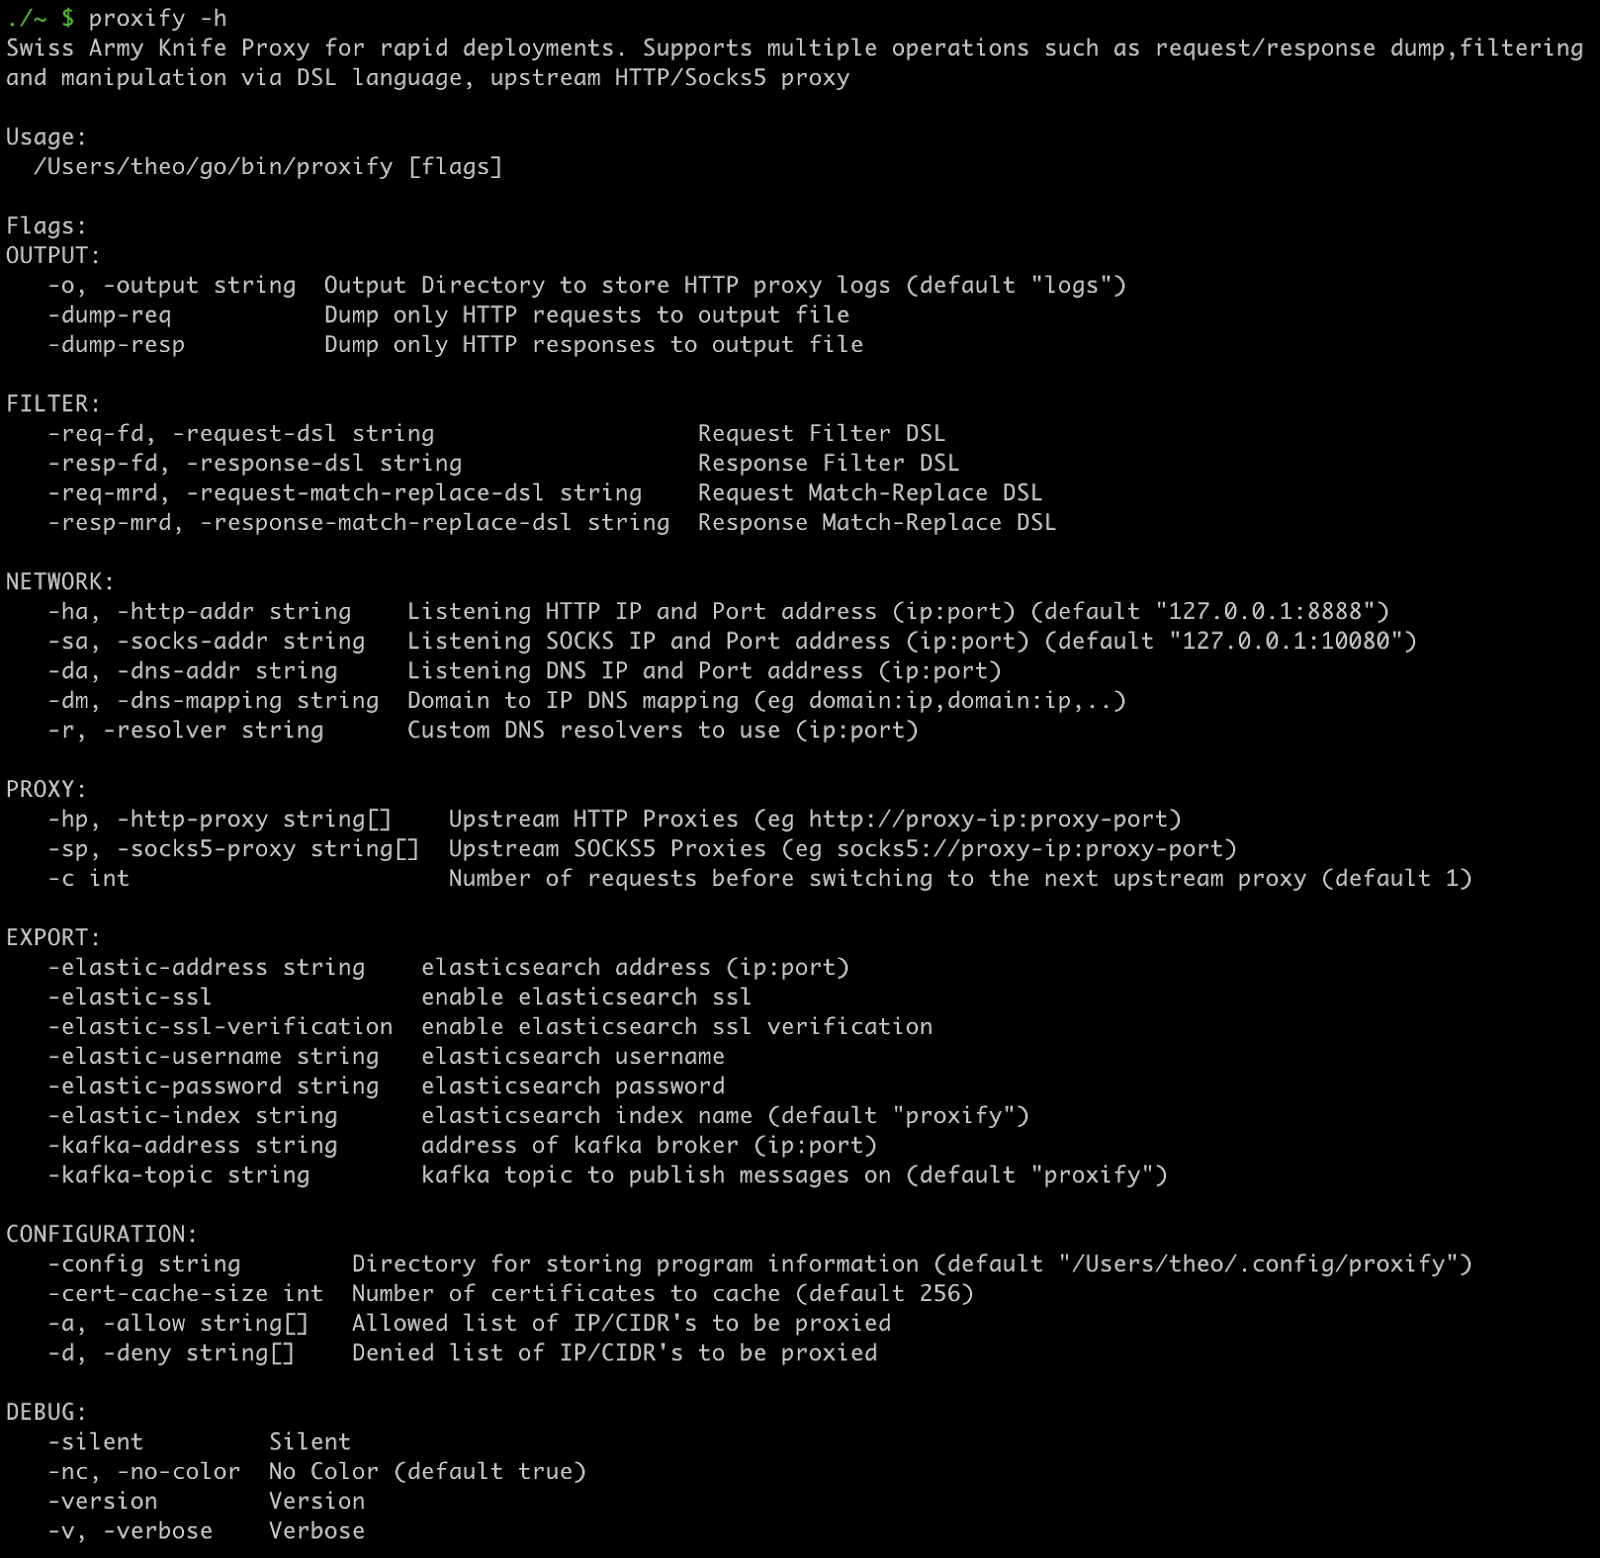
As you can see, there are plenty of options to meet all of your proxy needs.
Output options
Proxify allows you to store all your browsing history locally. By default, upon initiation of Proxify, the logs directory is created in your current directory to store all HTTP proxy logs. You can modify this location and specify the name of the file using the -o option.

You can see from the output that all traffic will now be saved to the specified directory.
The -dump-req and -dump-resp options are fairly self-explanatory and can be used to specify whether to dump only responses or only requests to the output file. When dumping requests the output will be tagged with a request, and when dumping responses, the output will be tagged with the response.

You can also use the -o option with either one of these to specify what and where to dump, such as proxify -o google-requests -dump-req which would dump all requests to the "google-requests" directory.
Filter
There are two types of Proxify filters which both utilize DSL language. Matching and replacing.
Matching
To use the matching filter, you need to specify keywords to match and whether you'd like to filter requests or responses. If there is a match, then the dump is tagged with .match.txt for ease of filtering later on. You can use the request and response matching filters together, for example:
proxify -request-dsl "contains(request,'Firefox')" -response-dsl "contains(response, md5('test'))"Replacing
You can also replace your matches with whatever you choose. The syntax for replacing looks like this:
proxify -[request/response]-match-replace-dsl “replace([request/response],’[word-to-match]’,’[word-to-replace-with]’)”These options can also be shortened to -req-mrd for requests and -resp-mrd for responses.
Here’s an example of how you could use replace to replace all instances of "Chrome" with "Firefox":
proxify -req-mrd "replace(request,'Chrome','Firefox')"
Here’s an example of how to use a replace rule on a response:
proxify -resp-mrd "replace(response, 'Location', '')"
You can see from the output above that the entire Location header disappears, instead of just the word "Location", this is probably because it wouldn't be a valid HTTP request with a null HTTP header key.
Network
Proxify’s default settings set up a proxy server on localhost on ports 8888 and 10080. You can specify different listening addresses/ports if you wish with the following options:
-http-addrchanges the HTTP proxy-socks-addrchanges the socks proxy-dns-addrchanges the DNS proxy
You can also use Proxify for DNS mapping in times when you need to map a domain name to a custom IP address! Simply run proxify -dm domain:ip or if you need to map multiple domains you can run proxify -dm domain:ip,domain:ip,domain:ip and so on.
Proxify Use Cases
Logging
Setting proxify as an upstream proxy for your web browser or Burp Suite is a great way to keep fully detailed logs. Configuring Burp Suite to use an upstream proxy is simple:

Spinning up a simple proxy on a VPS
One of the awesome things about Proxify is the ability to run a proxy straight from the CLI. This is extremely useful if your traffic needs to come from a specific location for a penetration test. It’s also really simple and quick to set up! All you need to do is:
- Set up your VPS using your preferred provider. I used a Digital Ocean droplet based in Singapore with an Ubuntu OS.
- Connect to your VPS using SSH.
- Install the prerequisites for Proxify. Depending on your VPS this may include installing system updates and Golang for example.
- Install Proxify by following the installation instructions above
- You’ll then need to transfer your cacert.pem file to your local machine so you can add it to your browser’s list of trusted certificates. You will find this file in
~/.config/proxify. I did this using SCP and Google Chrome on a Macbook: - Grab the
cacert.pemfile onto your local machine using SCP.scp user@host:~/.config/proxify/cacert.pem - Go to Google Chrome Settings > Privacy and security > Security > Manage Certificates.
- Keychain Access is opened. Go to File > Import Items > Downloads >
cacert-vps.pem. Once imported, mark the certificate as trusted. - Head to Google Chrome and Settings > System > Open your computer’s proxy settings. You’ll then need to configure the proxy using VPS-Public-IP:8888.
- Time to set up the proxy. In your VPS terminal, run
proxify -ha 0.0.0.0:8888. This will set up a proxy that listens on all network cards, making it accessible to the internet. - Make sure your proxy settings are configured and enabled in your browser, and now your traffic will be sent via your proxy!
You can use ipinfo.io to check your IP address geolocation info to prove that your traffic is being passed through your proxy.

You can see that the geolocation data for my IP address changes from Australia to Singapore when the proxy is toggled on/off. You will also see the IP address changes, but I removed mine for this GIF!
Wrapping it up
There are many different types and applications for proxies, and we have only touched the surface. Proxify is an awesome tool and aptly described as a Swiss Army Knife. It’s small, neat and has many different functionalities! The speed at which Proxify can be installed and set up on the CLI allows for easy use on any machine! The ability to log all of your traffic locally allows for easy processing and analyzing later on. Happy Proxifying!
– Theo Bridgeman, @HackTheBridge