Introduction
In this article, we’re going to walk through hacking together a simple attack surface monitoring platform by using ProjectDiscovery tools, bash, and flask. We will also be using MongoDB & Redis for scan data and scan queues.
This tool was written for the pure purpose of this article, if you would like to contribute to it or fork the repository, I encourage you to! The whole concept of the ProjectDiscovery tool suite is that it is modular, allowing you to tweak it to your heart's content!
All the code for this is written up at https://github.com/pry0cc/pdiscovery-bot, feel free to contribute to the code there.
The Plan
We are going to leverage ProjectDiscovery tools to build out a quick’n’dirty ASM (Attack Surface Monitoring/Management) solution, split into 5 components. The scanner, the scheduler, the importer, the queue and finally the API.
- The scanner will scan the targets and output the results in JSON format to a directory.
- The importer script will parse and import the JSON output files produced by the scanner
- The queue will consist of a Redis list, when new jobs are added to the queue, the worker will trigger the scanner script.
- The API will let us add jobs to the queue to start scans, as well as query the imported data from the MongoDB database.
Below is a diagram of how everything will fit together.

In the next section, let's get to building the platform!
The scanner
The scanner is the thing you probably think about when you hear about an Attack Surface Monitoring (ASM) platform.
This script will take one argument, target_id. This target_id will be checked for in scope <target_id>
Then, we will make the appropriate paths, and then the meat of the scan:

The beginning of the scanner script:

This section sets up the directories, sets the scan ID, and copies the scope information over to the scan directory.

In this next section, we perform the scan, run some other tools, import to MongoDB using the import.py script (we will cover later) and using the tool Anew check for new entries and notify if present.
cat scope.txt | subfinder -json -o subs.json | jq --unbuffered -r '.host' | dnsx -json -o dnsx.json | jq --unbuffered -r '.host' | httpx -json -o http.json | jq -r nuclei -o nuclei.txt -severity info,low,medium,high,critical -t ~/nuclei-templates --stats | notify -pc "$ppath/config/notify.yaml" -mf "New vuln found! {{data}}"Let’s break this down.
cat scope.txt | subfinder -json -o subs.json
Take root domains and pipe them into subfinder, output in JSON
jq --unbuffered -r '.host'
Extract hostname from JSON, unbuffered means that it prints out for every new line and doesn’t hang
dnsx -json -o dnsx.json
DNSx perform DNS lookups and output in JSON
jq --unbuffered -r '.host'
Extract resolved hostnames
httpx -json -o http.json
Perform HTTPx enumeration on resolved hostnames to discover webservers and output to JSON
jq —unbuffered -r ‘.url’
Extract URL from JSON output
nuclei -o nuclei.json -json -severity low -t --stats
Run Nuclei on the URLs discovered (setting severity to low for testing purposes, but you could set -t severity medium,high,critical most likely.)
jq -c --unbuffered 'del(.timestamp) | del(."curl-command")'
Using JQ, we need to remove the keys “timestamp” and “curl-command” from the nuclei JSON output, we do this so that the lines in the file are unique, otherwise the timestamps and the dynamic user agents in the “curl-command” key will end up disturbing the uniqueness of the lines. This limits our ability to notify only on new vulnerabilities.
anew "$raw_path/nuclei.json"
Only append new records to nuclei.json
notify -pc "$ppath/config/notify.yaml" -mf "New vuln found! {{data}}"
Notify newly discovered vulnerabilities from Nuclei
find "$scan_path" -type f -name "*.json" -exec "$ppath/bin/import.py" {} "$scan_id" "$target_id" \;
Find all the JSON files in the scan directory and import them using the import.py script which we will cover in the next section.
cat subs.json | jq -r '.host' | anew "$raw_path/hosts.txt" > "$raw_path/hosts.txt.new" | notify -bulk -i "$raw_path/hosts.txt.new" -pc "$ppath/config/notify.yaml" -mf "New Hostnames Found! {{data}}"Using Anew, we can compare the hosts from the current subs.json file and alert new hosts. Using the -mf flag with notify, we can add a nice “New Hostnames Found!” alert.
The Databases & Importer / Parser
We’re running a MongoDB database and a Redis queue (more about Redis in the next section).

We can easily start both a Redis server and a Mongo server using the above Docker commands.

This is the import script. Using this script, we can import the JSON files generated by the tools. This includes the subdomains, the httpx output, the dnsx output, the nuclei output and the tlsx output.
It works by iterating through each line in each file, parsing the JSON, and then bulk importing it to MongoDB. Later in this blog, we will build an API that allows us to query this information from the database.
The Queue & The Worker
The next part of the platform is the queue and the worker scripts. The queue is implemented using lists in Redis.

This is the worker script. The worker script will query the Redis queue called ‘queue’ using the RPOP method. RPOP removes the last item off the queue and returns it. This means that theoretically, we could run multiple worker nodes across multiple systems! We could use a solution such as axiom.
In this case, the items pushed to the queue are the target_id variables. This references a file inside scope <target_id> as defined in the scanning script. Simply add a file inside the scope/ directory, and the name of the file is the target_id.
For example, in our current directory we have several scope files, including AirBnb or AT&T.

The Scheduler
Now if we want to run our scans on a regular basis, we can make use of a scheduler script!
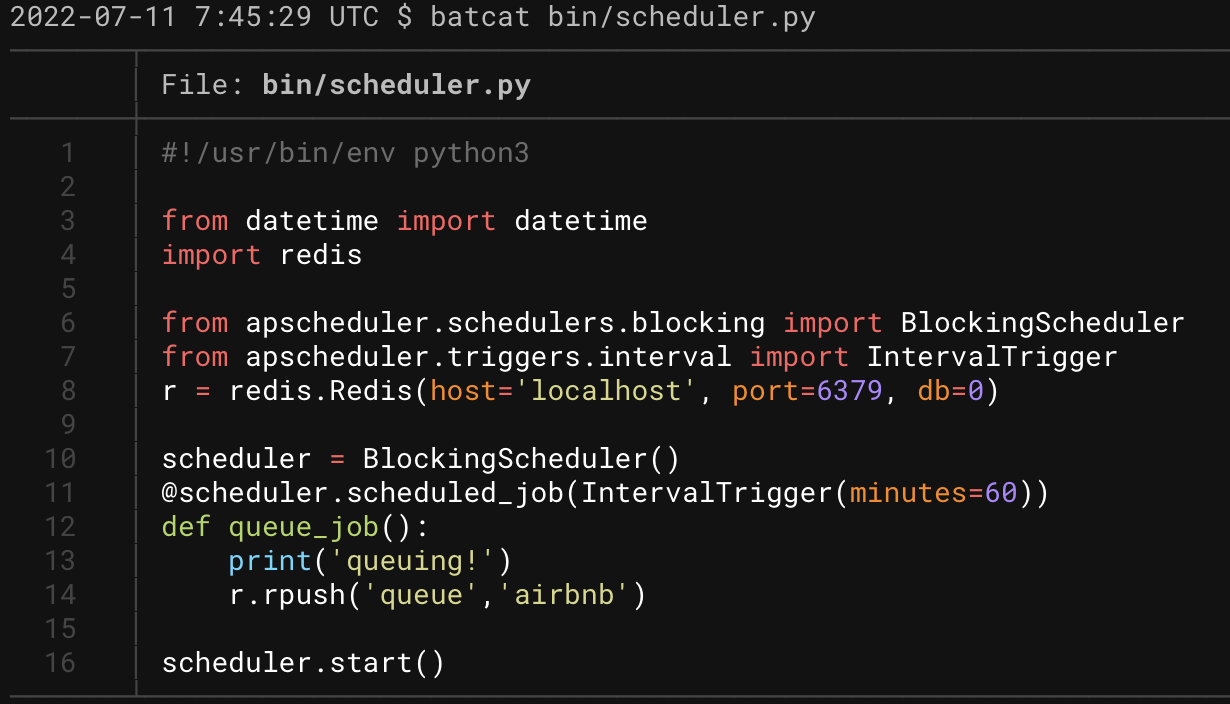
In this script, using the apscheduler python package, we can define intervals to schedule adding a job to the queue manually using the Redis queue! We can define it to push to the queue once every hour, once every 24 hours, or once every minute if we choose! As with all these scripts, they need to be run independently, either in Docker containers (not written at time of writing), or inside different terminal or tmux windows.
Bringing it all together with the API
If you’ve made it this far, congratulations! This is the home stretch!
So far, we have the scanner, the importer, the queue and the scheduler. We can continually schedule scans to run 🏃♂️
What else do we need? A way to query the results! 🔎
Introducing the API! 🎉

This is a Python3 API written using the Flask framework.

In this section, we transcribe the target_id and the data type to a Mongo query. We allow the user to specify an argument using the request.args.get() function. Using this flag, users can limit the results down to a single scan rather than all the results (the default).
After we perform the query, we iterate through the results returned from the database and remove the _id fields. These fields contain invalid data types that will break python, also, we don’t need them!
Finally, we return a JSON object of the database results to the user!
Now we can run the server using flask run (make sure you have all the dependencies installed, pip3 install -r requirements.txt inside the bin folder)

Once the server is up, we can query it using curl, but how do we start scans? If we want to add a target, we simply need to add a file scope/<target_id> . Then using that target ID, we can start a scan over HTTP too.

curl -s "http://127.0.0.1:5000/start_scan?target=airbnb"This will launch a scan by adding “airbnb” the queue, which will be picked up by the worker
The path in the URL (in this case /subs) is derived from the name of the JSON file we import as set in the scanner.sh script. Any other JSON file we generate in that directory will now get imported, awesome! We also have the following routes and data sources for our use:
- /api/<target>/subs
- /api/<target>/http
- /api/<target>/dnsx
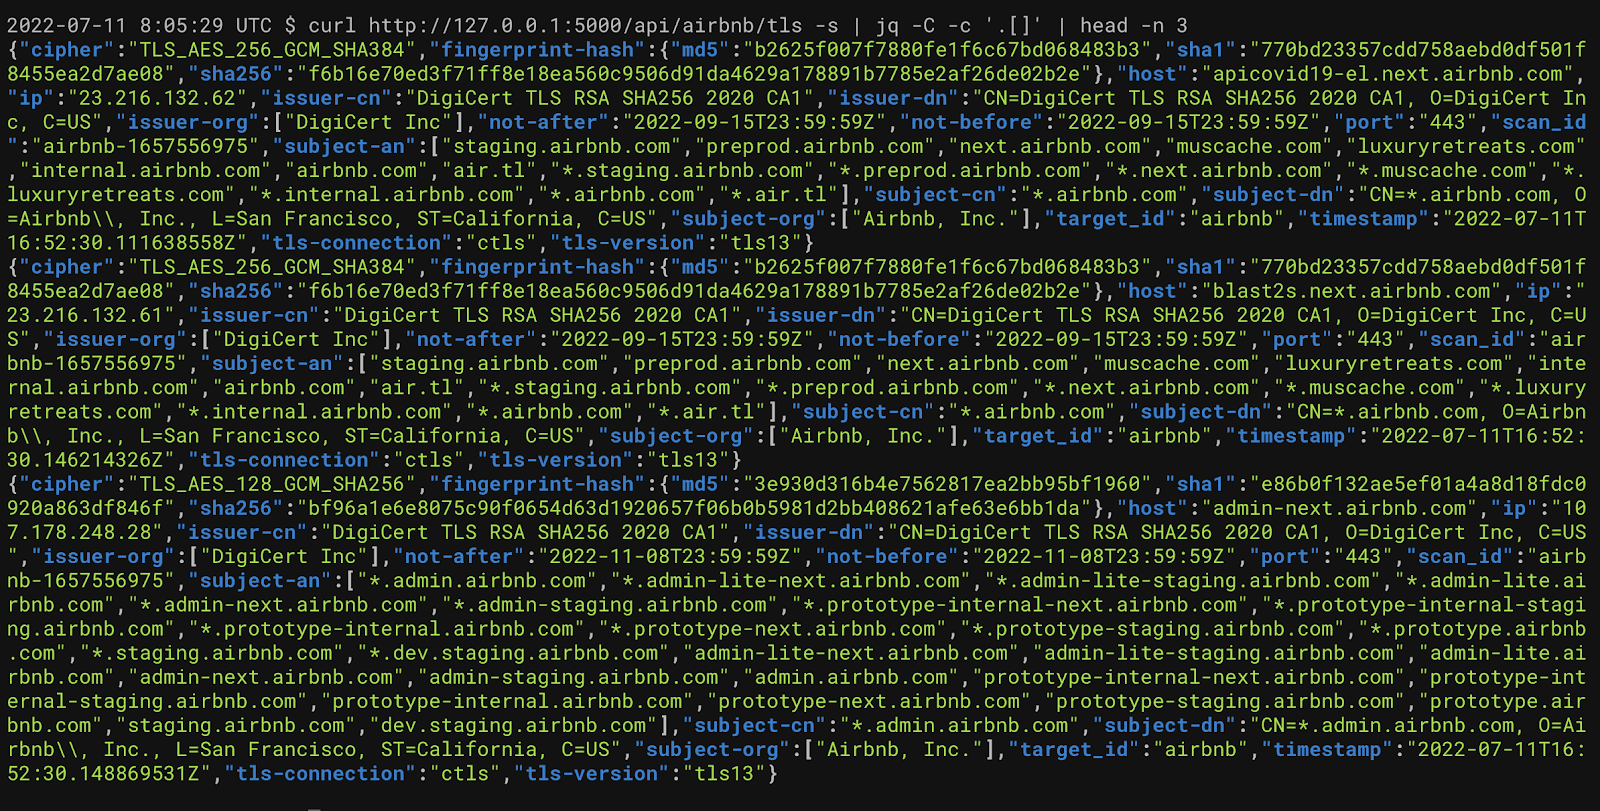
- /api/<target>/tls
- /api/<target>/scans
Additionally, we can also add ?scan_id=<scan_id> to any URL and limit the results. For example:
curl -s ”http://127.0.0.1:5000/api/airbnb/subs?scan_id=airbnb-1657556975“

There's a good chnace that you'll want to parse this data, here are a few one-liners that might help.
curl -s "http://127.0.0.1:5000/api/army/scans"
curl -s "http://127.0.0.1:5000/api/army/subs" | jq -r '.[].host' | anew
curl -s "http://127.0.0.1:5000/api/army/subs" | jq -r '.[].source' | sort | uniq -c | sort -rh
curl -s "http://127.0.0.1:5000/api/army/dnsx" | jq -r '.[].a?[]?' | anew
curl -s "http://127.0.0.1:5000/api/army/dnsx" | jq -r '.[].a?[]?' | anew | ipinfo bulk
curl -s "http://127.0.0.1:5000/api/army/dnsx" | jq -r '.[].a?[]?' | anew | ipinfo summarize
curl -s "http://127.0.0.1:5000/api/army/dnsx" | jq -r ".[].cname?[]?"
curl -s "http://127.0.0.1:5000/api/army/dnsx?scan_id=army-1657627777" | jq -r '.[].host'
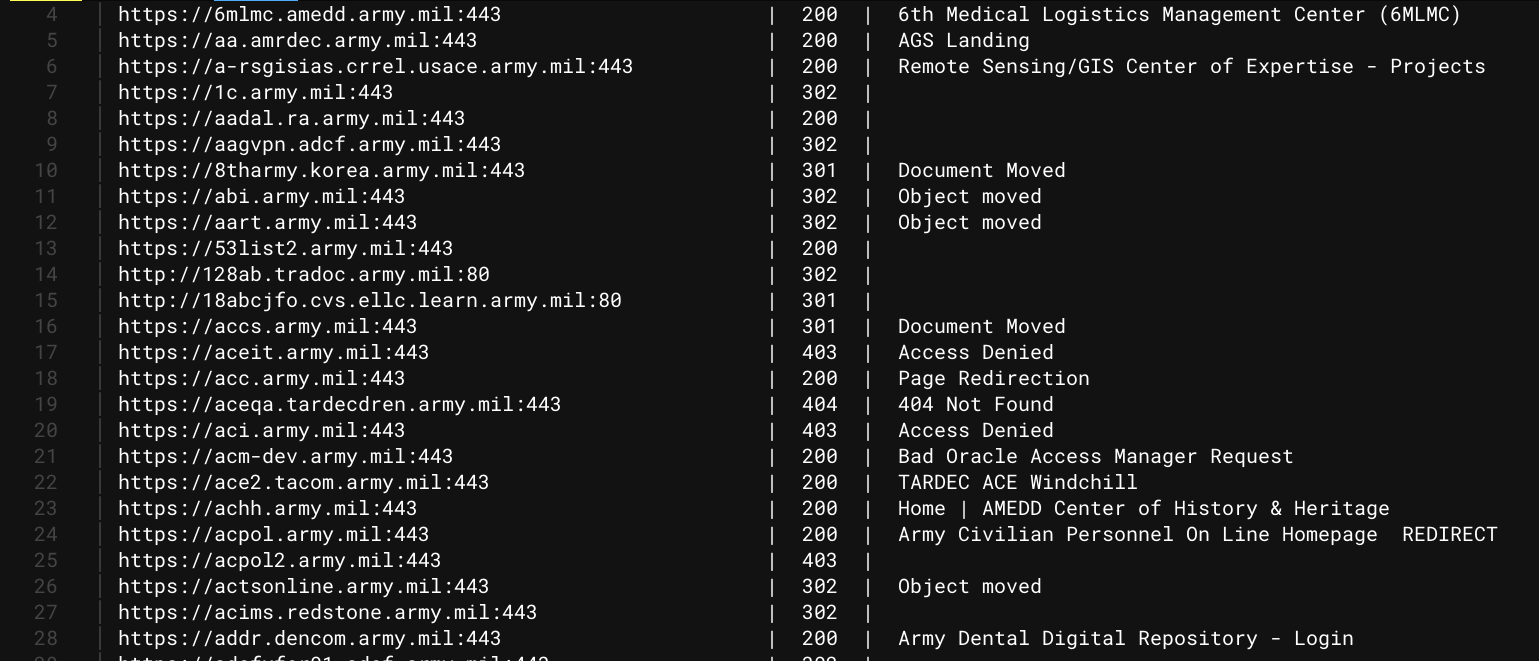
curl -s "http://127.0.0.1:5000/api/army/http" | jq -r '.[].url'
curl -s "http://127.0.0.1:5000/api/army/http" | jq -r '.[] | [.url,."status-code",.title] | @csv' | csvtomd | batcat
curl -s "http://127.0.0.1:5000/api/army/nuclei" | jq '.[] | [.info.name, .template, .info.severity] | @csv' -r | anew

curl -s "http://127.0.0.1:5000/api/army/tls" | jq -r '.[]."subject-dn"'
curl -s "http://127.0.0.1:5000/api/army/tls" | jq -r '.[]."subject-cn"'
Conclusion
I ran this for a couple days, and I set army.mil as the target, using slack as my notification provider.
And it works! 🎉 I found a bunch of low risk vulnerabilities off the bat. Now we can easily start adding to the scanner script, adding more checks, and maybe we could beef up the DNS enumeration too? Perhaps we should write a CLI client?
- Ben Bidmead, @pry0cc