
A tour of ProjectDiscovery's less-known public tools, and how to use them by @pry0cc
Introduction
For those unaware, ProjectDiscovery is a group of talented hackers and creators that have massively disrupted the offensive tooling industry by creating tooling that genuinely makes the lives of hackers easier.
If you’re active in the offensive security industry or bug bounty, you’ve likely heard of some of their brilliant flagship tools such as nuclei, httpx, dnsx, naabu and subfinder. These are fantastic tools that I use everyday, however, they have been hard at work ever since the first release of Subfinder in 2018, resulting in a bunch of other useful tools that many don't know about.
By using the tools in this article, you will no doubt pick up a few tricks that will speed up and smooth out your testing methodology, and make your life easier.
Today we are going to be providing a quick tour of the following tools:
MapCIDR
To begin, we’re going to talk a bit about Mapcidr. If you have heard of `prips` before, this tool will make perfect sense to you. Prips allows you to expand a network range into individual IP addresses. For example, if you have a /24 network, e.g 192.168.0.1/24, running prips 192.168.0.1/24 will output a list of individual IP addresses for every IP in the range.
Mapcidr handles the heavy lifting of subnetting for you. This can be incredibly useful if you are performing reconnaissance across a large network range, and need to split up the load across many devices (for example with a tool like axiom).
Installation
For all of these tools we’re going to discuss, you’re going to need Golang setup and configured. If you want an easy setup for this, Axiom has this configured for you.
If you don’t have Golang, you can install it with these commands:GO_URL="https://golang.org/dl/go1.17.linux-amd64.tar.gz"
wget -O /tmp/go.tar.gz "$GO_URL"; sudo tar -C /usr/local -xzf /tmp/go.tar.gz
Once Go is ready, run the following one liner:go install -v github.com/projectdiscovery/mapcidr/cmd/mapcidr@latest
MapCIDR in Action
Let's say you’re doing bug bounty for Apple.
By going to ipinfo.io/countries/us and scrolling down to Apple Inc, you can easily obtain an example range to play with. We’re going to select the infamous 17.0.0.0/8 network which has ~16 million addresses.
Putting this range into nmap to scan is going to take quite a long time… So it can be helpful to split this up, perhaps you want to work with 254 addresses at a time.
If we run mapcidr -h, we can see an overview of the options available. For a simple subnetting swiss-army knife, we can see it is quite extensive.
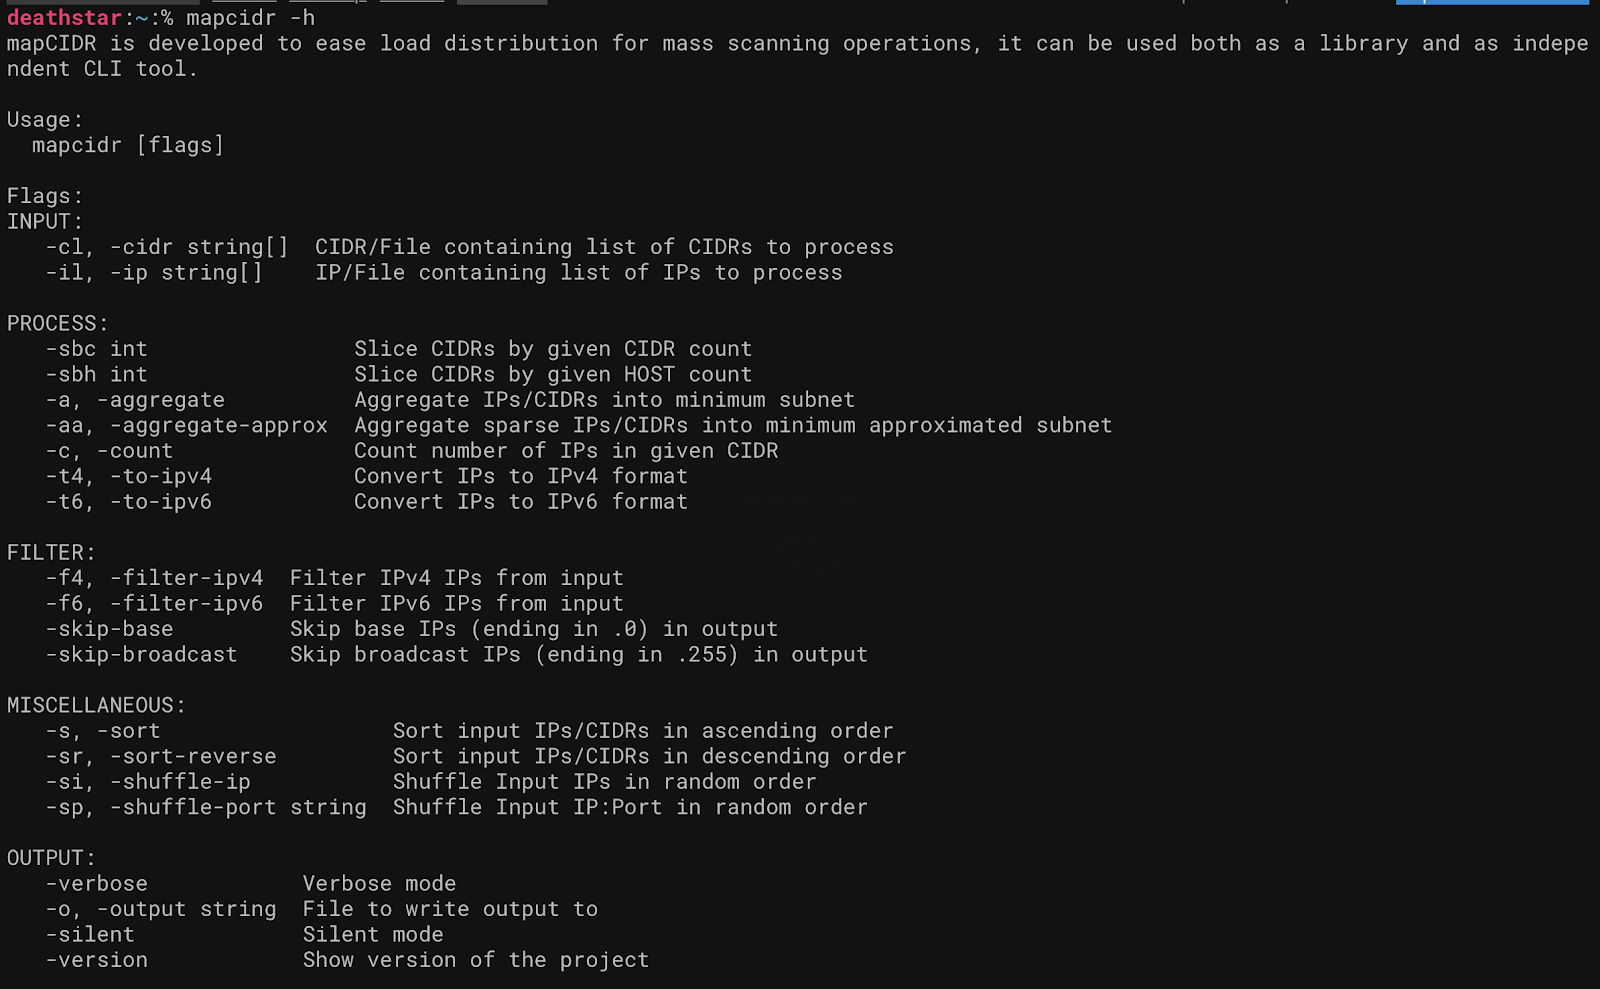
You can work with the tool however you choose, either by piping a list from stdout to the tool, or by specifying it inline. Additionally, there are little switches such as -skip-base and -skip-broadcast which removes the addresses ending in .0 and .255 accordingly as they are usually not usable.
Splitting by host count
In the below example, we split the entire /8 network range into subnets of 256 hosts.echo 17.0.0.0/8 | mapcidr -sbh 256
or you can specify inlinemapcidr -cidr 17.0.0.0/8 -sbh 256 -o 24.txt
Splitting evenly across hosts
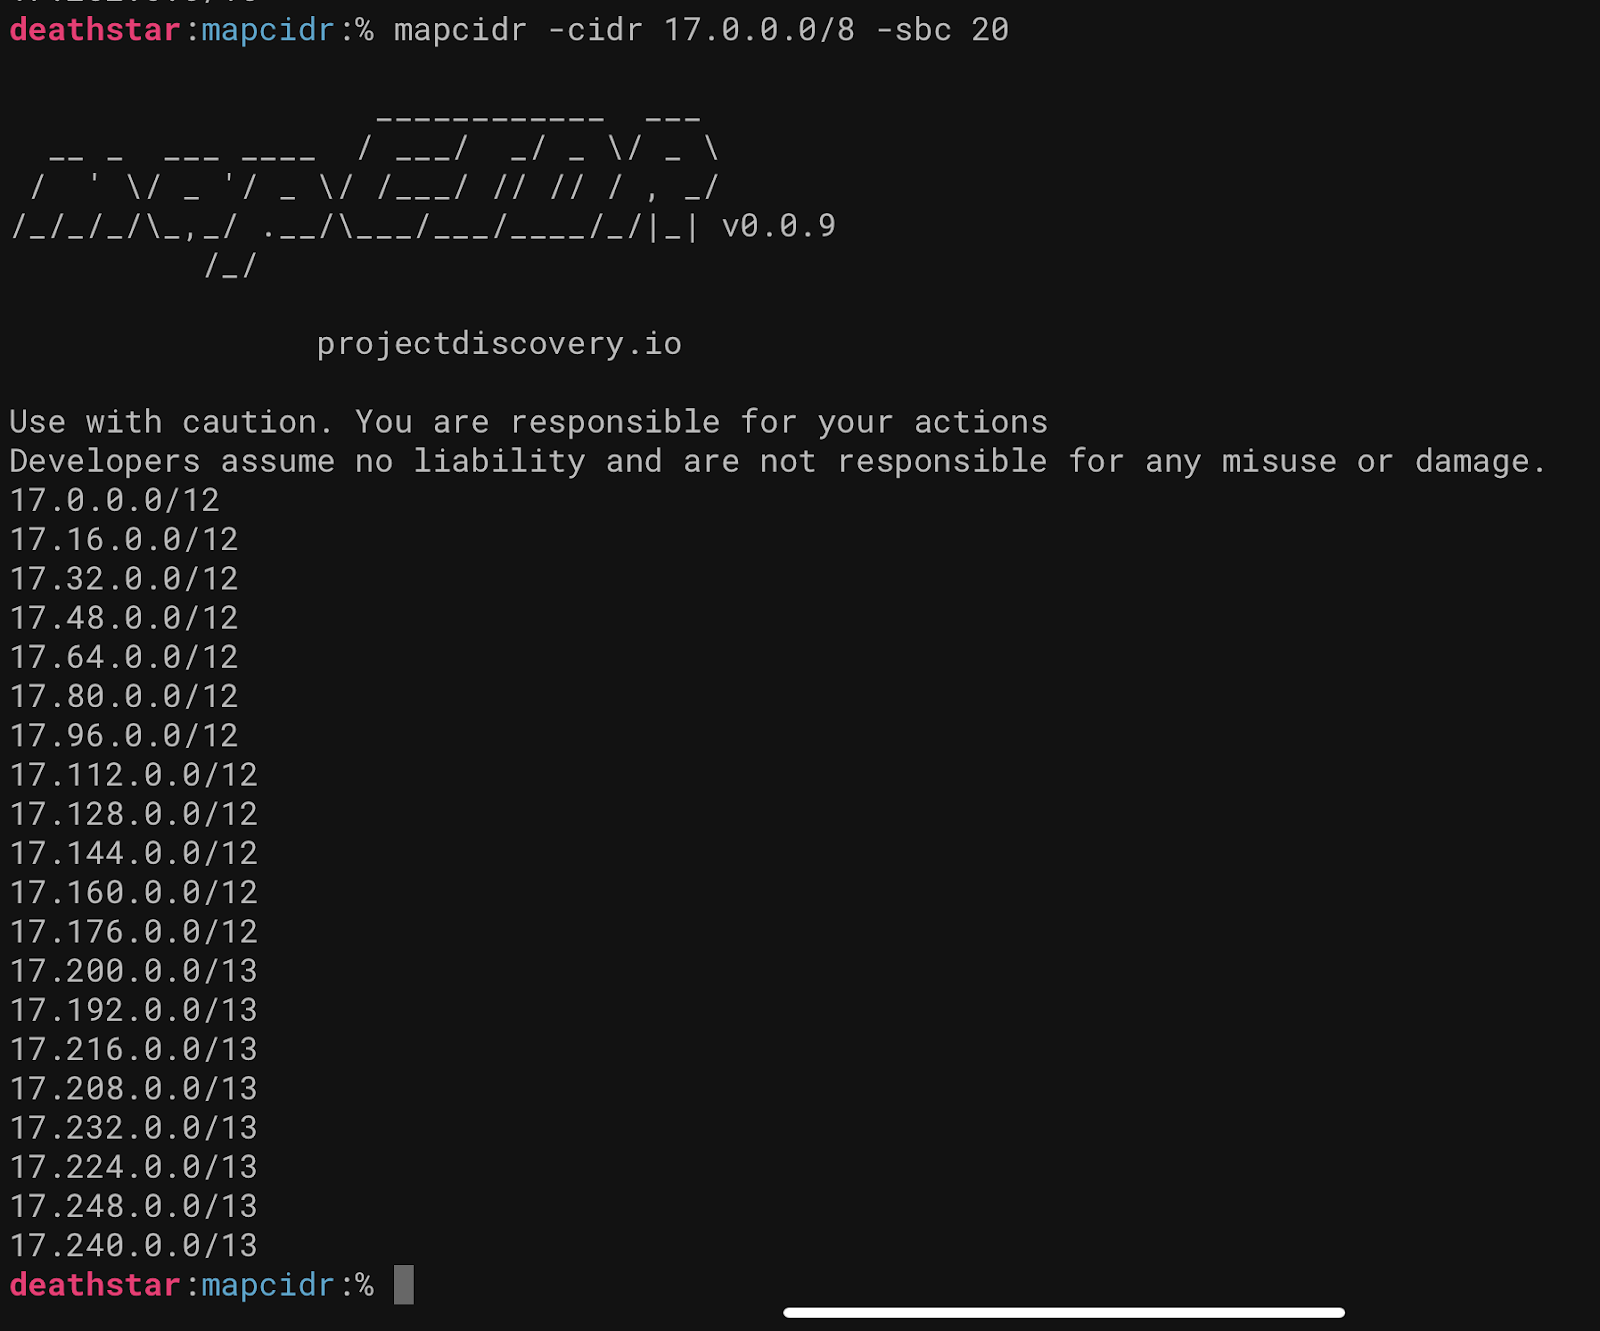
We can also perform a similar operation, say we want to split our network range 12 ways, perhaps we have 12 axiom instances and want to split them as evenly as we can, we can do the following:mapcidr -cidr 17.0.0.0/8 -sbc 12 -o split.txt
Aggregating IP’s to subnets
And finally, we can split the ranges to IPs and back!
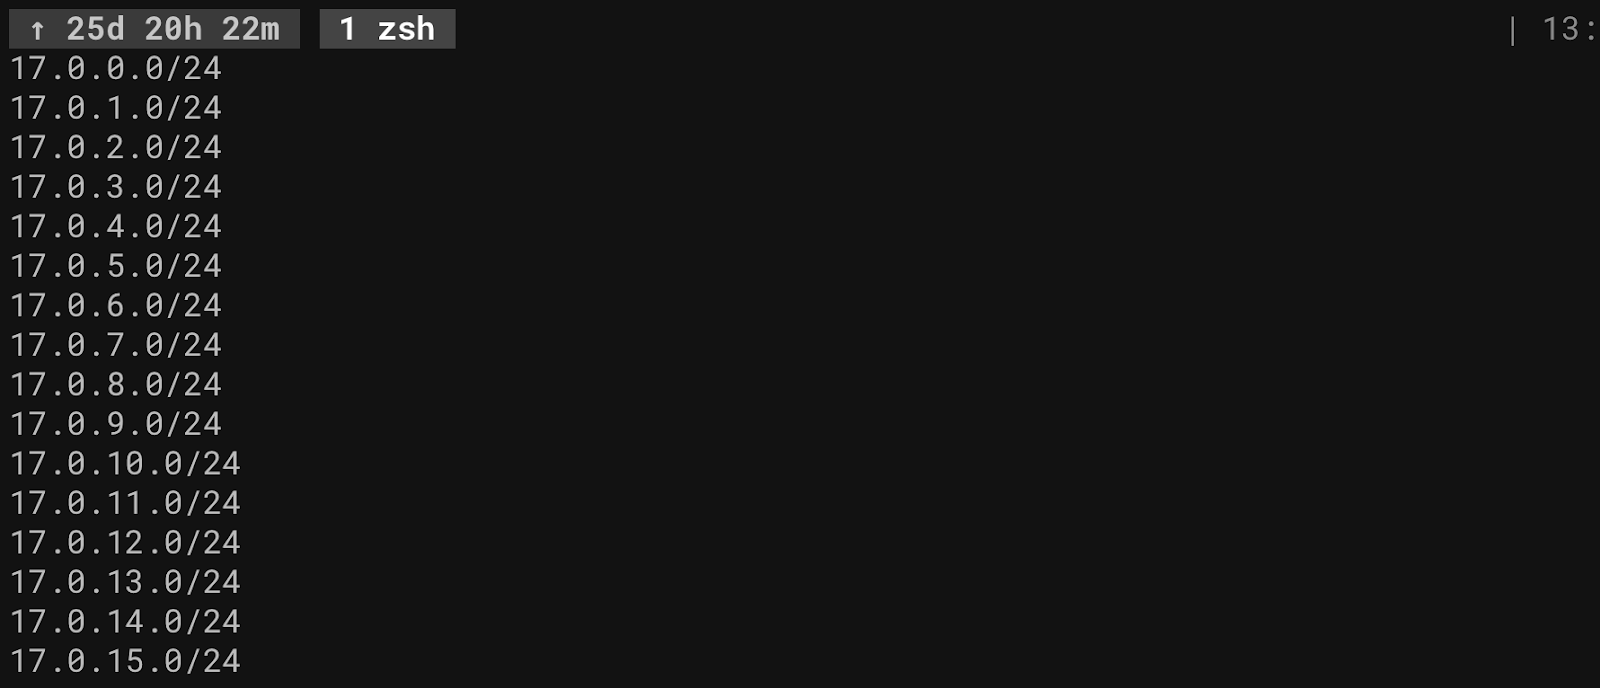
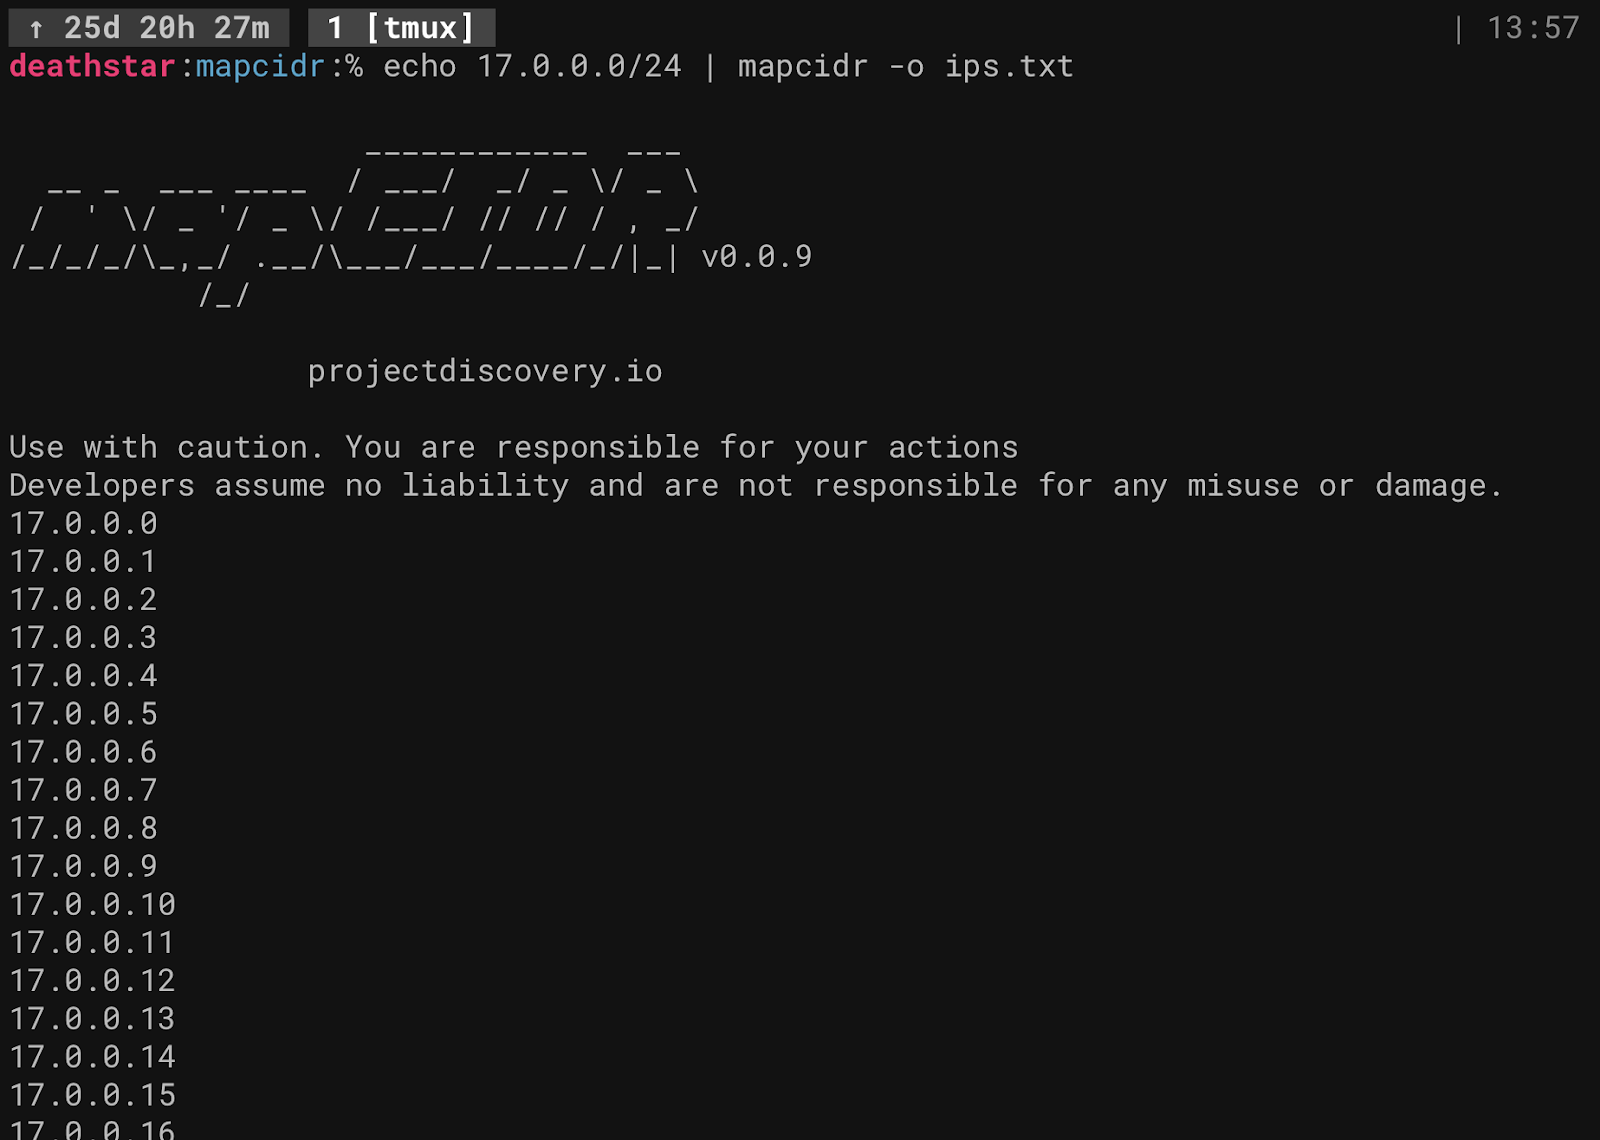
If you don’t provide any arguments to mapcidr, it will automatically split out into individual IP addresses just like our old friend prips.echo 17.0.0.0/24 | mapcidr -o ips.txt
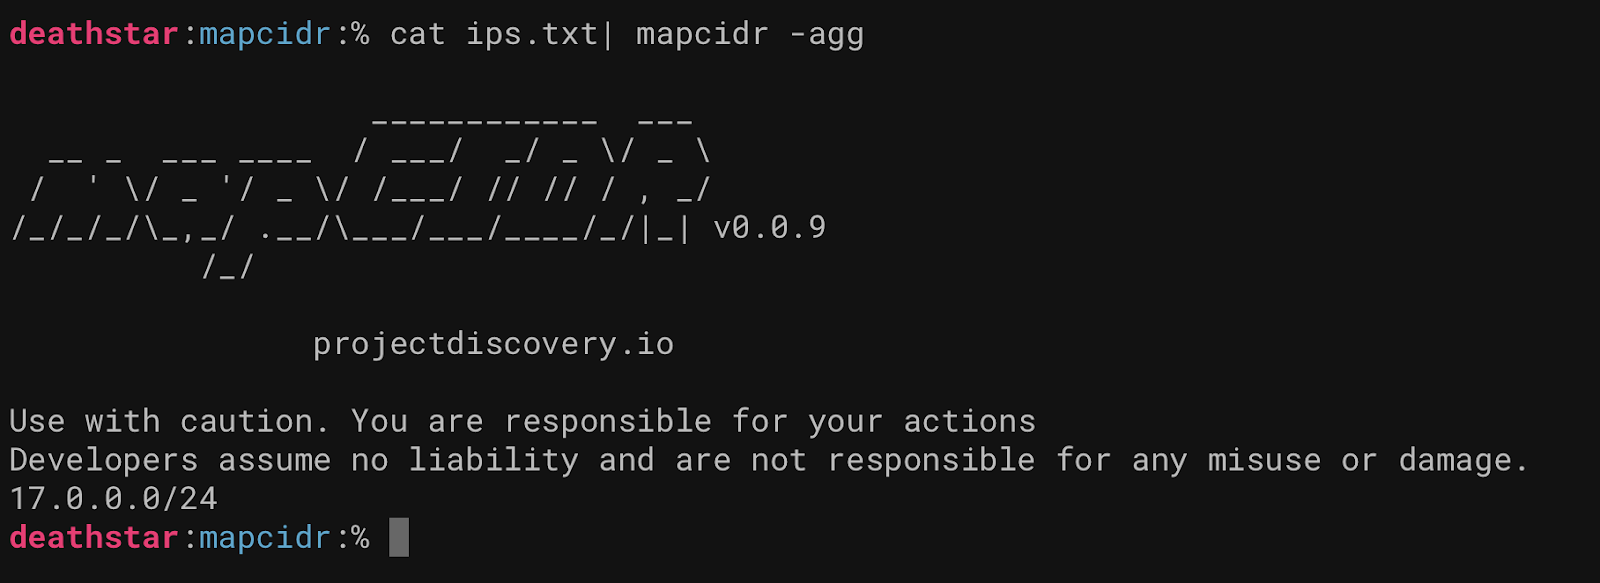
Say also we have been provided these IPs, lets compile them back to the CIDR they came from.cat ips.txt | mapcidr -a
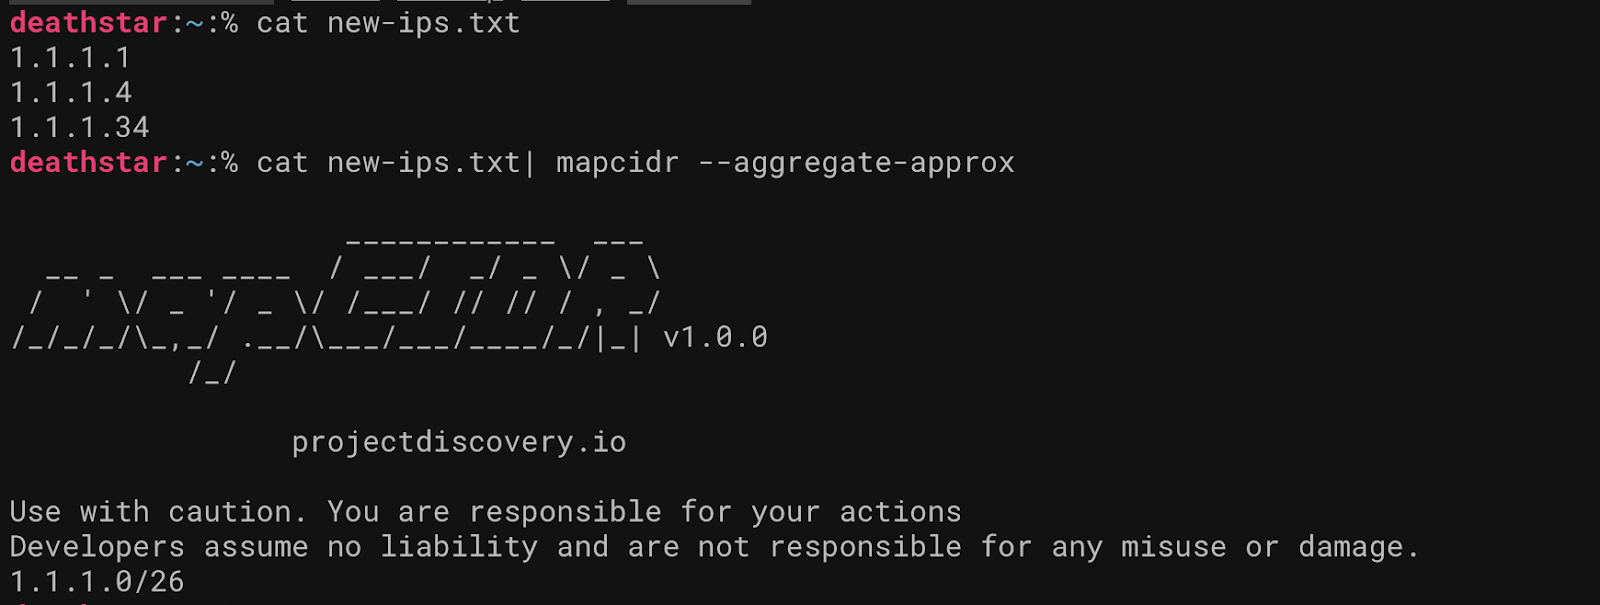
And like that, we are aggregated back to ranges! If your IP’s are not absolute, you can also use the -aggregate-approx flag, which will approximate and/or guess the ranges. An example:cat ips.txt | mapcidr -aa
The final option that was newly introduced is the filter options.
By using the -f4 and -f6 options, you can ensure that IPv4 and IPv6 is filtered from input accordingly.
Proxify
Proxy is a tool that will come naturally to you if you have ever used the Burpsuite intercepting proxy. Proxify allows you to quickly initialize a HTTP or SOCKS intercepting proxy so that you can easily modify requests on the fly.
Logging is a huge part of this tool workflow and can be invaluable to make sure you retain all the testing data so that you can easily audit and/or provide your testing logs to a client in the event it is needed. The tool has a wide range of export features including elasticsearch and kafka export. Other notable features include TLS MITM support, Traffic replay in Burp, a native embedded DNS server and match and replace support.
Installation
Installation is easy with the standard go install one liner!go install -v github.com/projectdiscovery/proxify/cmd/proxify@latest
Basic logging scenario
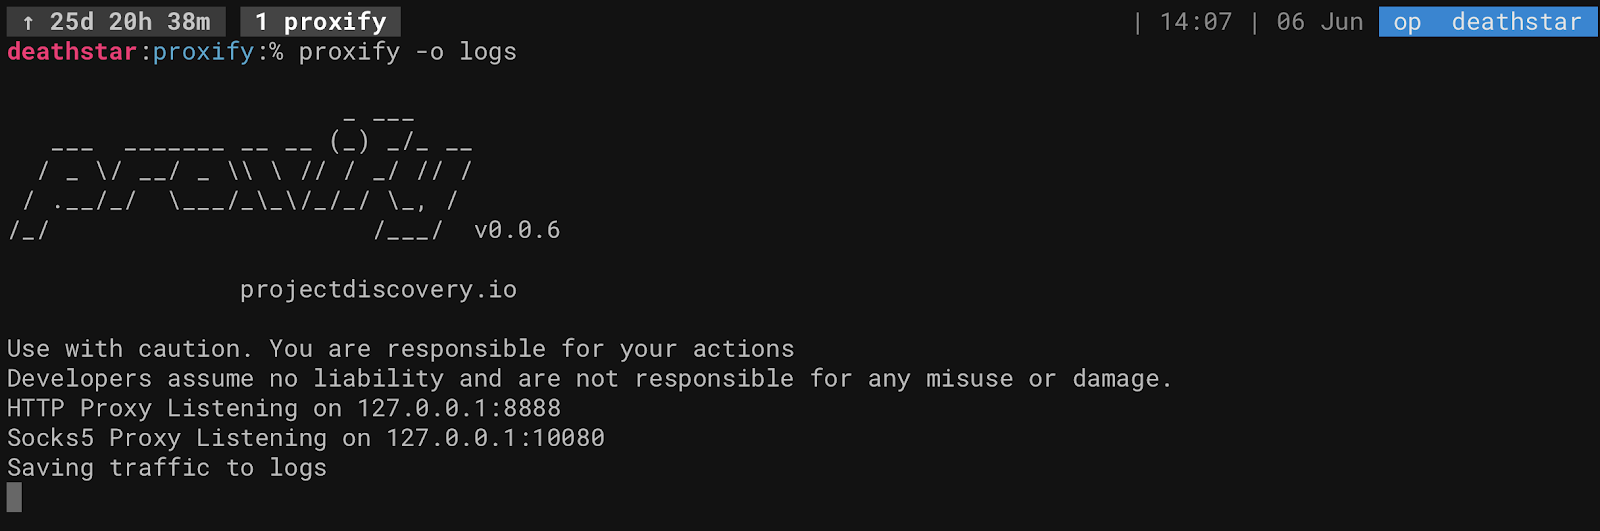
As with most of ProjectDiscovery tools, running the basic scenarios is as simple as running the tool.
This command will start proxify running on the default ports, (http:8888 and socks5:10080). These default ports are really well thought out as they won’t conflict with the default ports often used by burpsuite or other testing tools that start their own proxies.proxify -o logs
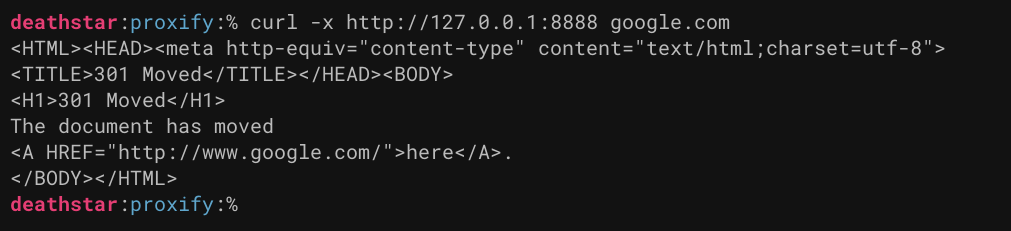
Then, configure your browser, or your tools to use these addresses as the proxy. You can do this easily with curl using the -x flag.
Now if we navigate into the logs directory, we will see our requests have been logged! Easy!
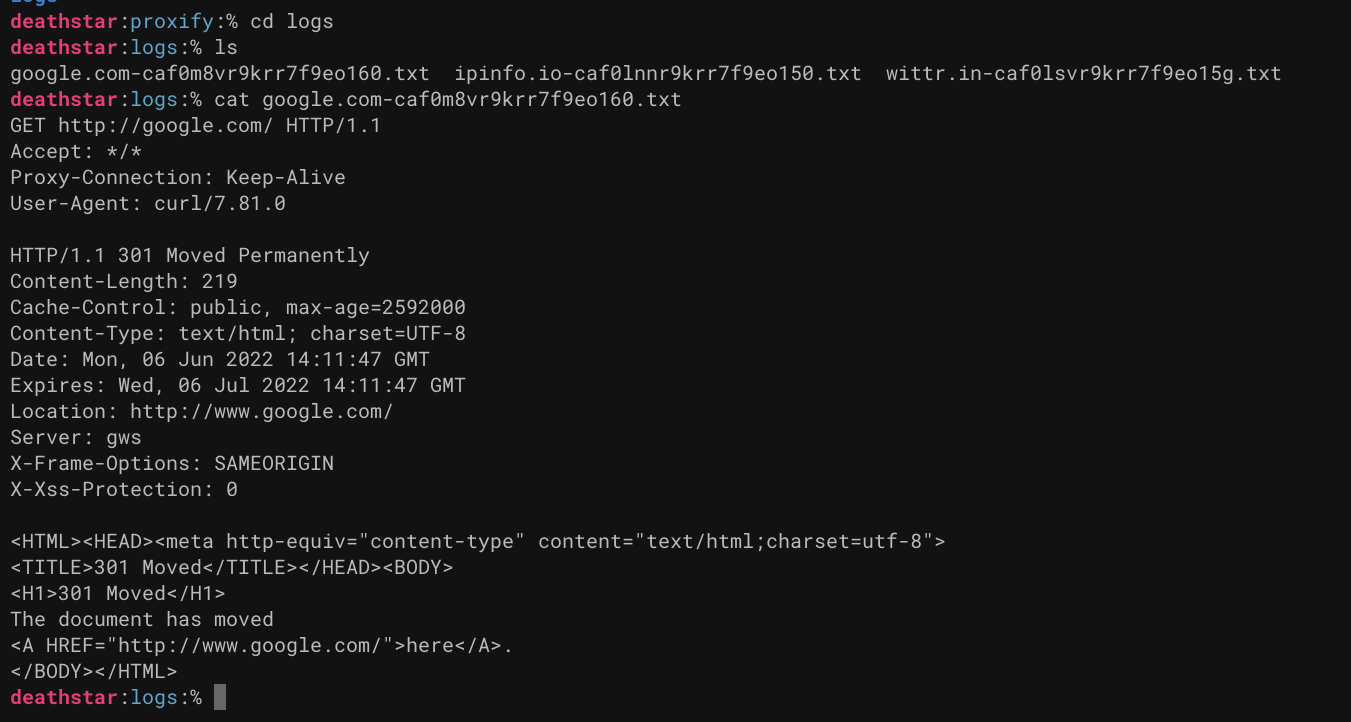
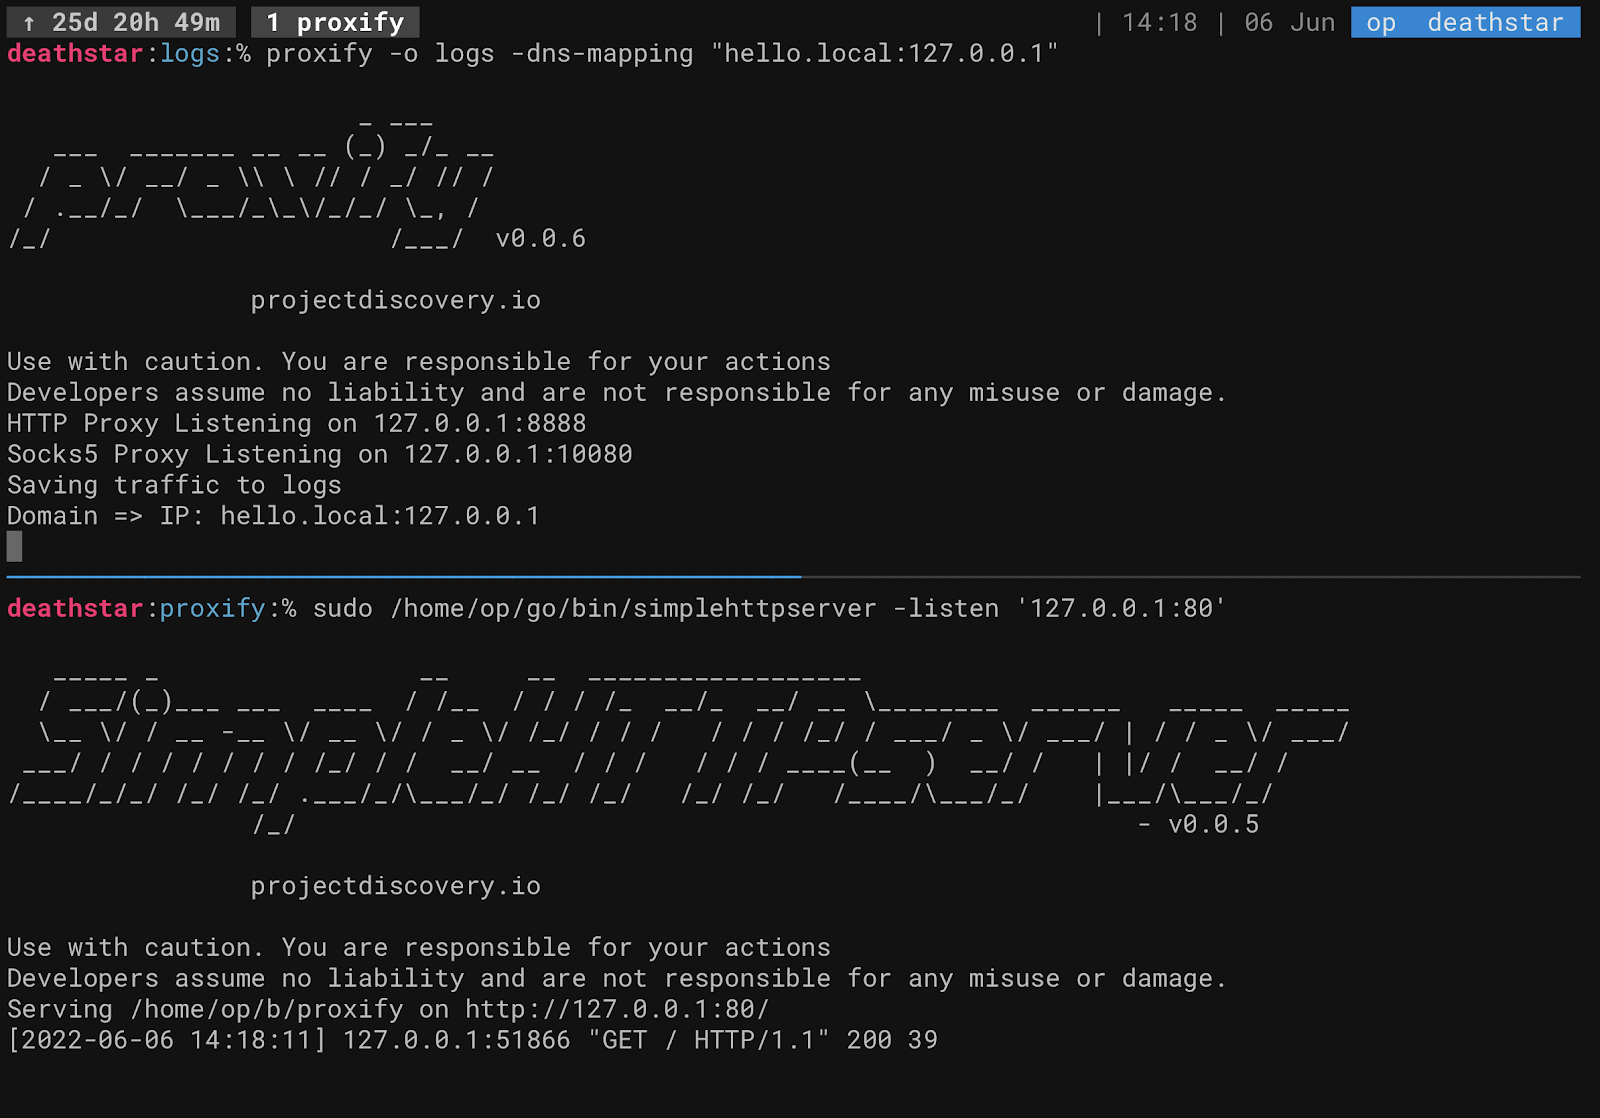
Custom DNS Mappings
Sometimes you may have a need to map a domain to a custom IP address. Once upon a time, you would need to either use Burpsuite, editing your hosts file, or setting up a custom DNS server. With proxify its as easy as this:proxify -dns-mapping "hello.local:127.0.0.1"
Now any requests made through the proxy will automatically resolve hello.local to the IP address we specified, cool right?
Match and Replace using DSL
Easily the most powerful side of this tool is the match and replace functionality.
I have made good use of this exact functionality in other tools in the past on prior engagements when the application was sporadically redirecting me. I found that if I created a rule to block all Location headers, I could view sensitive information in the application.
With proxify it is as easy as:proxify -resp-mrd "replace(response, 'Location', '')"
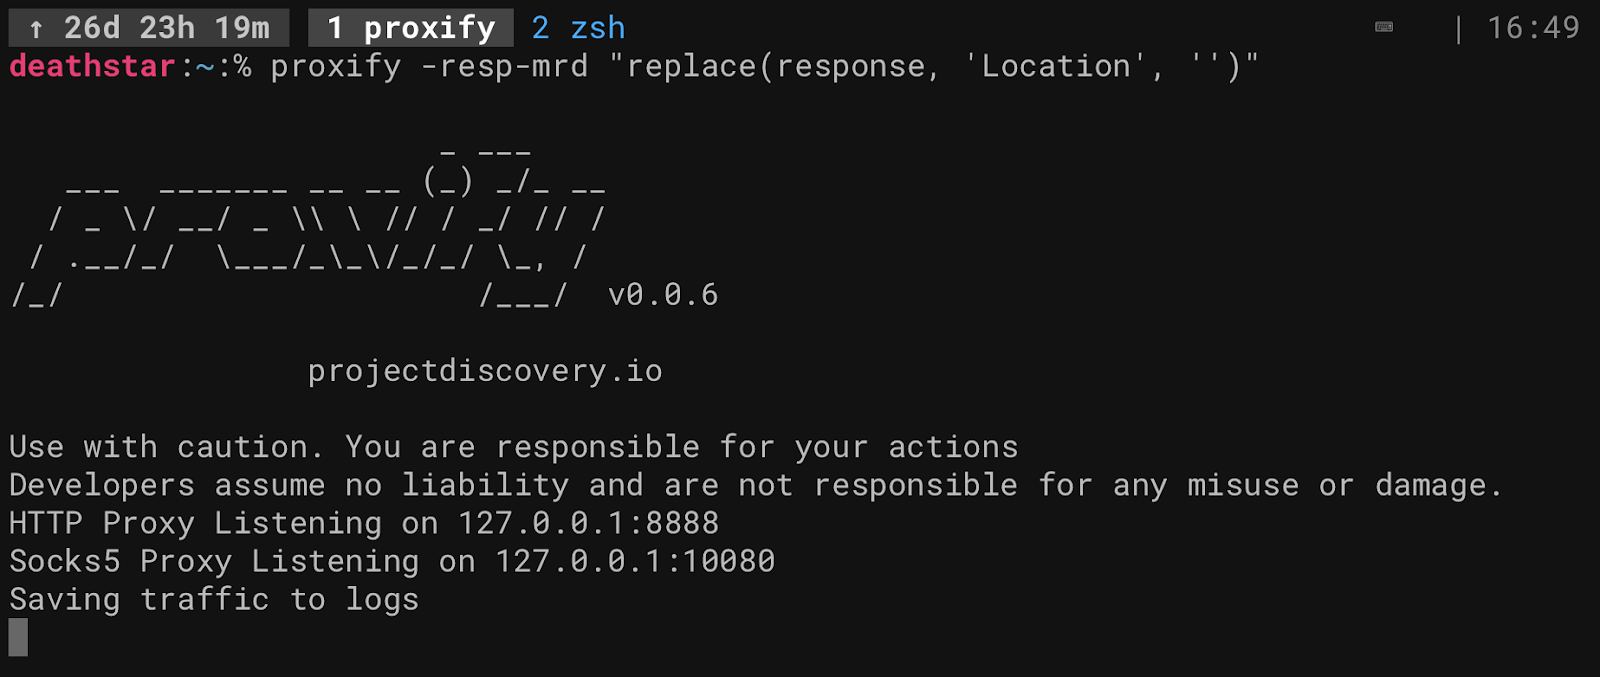
And when we curl google.com as our example, voila, Location header is removed!

Simplehttpserver
Simplehttpserver may sound extremely familiar, and that is because it is inspired of the infamous built-in HTTP server that comes with Python!
The fact that this tool comes released as a binary is extremely useful for red teams and penetration tests. There are many occasions where you need to exfiltrate data or temporarily spawn a HTTP server to drop your tools.
Installation
Install with our handy go one-liner:go install -v github.com/projectdiscovery/simplehttpserver/cmd/simplehttpserver@latest
Basic Usage
Using simplehttpserver is simple! (excuse the pun, it is the best description I could come up with).
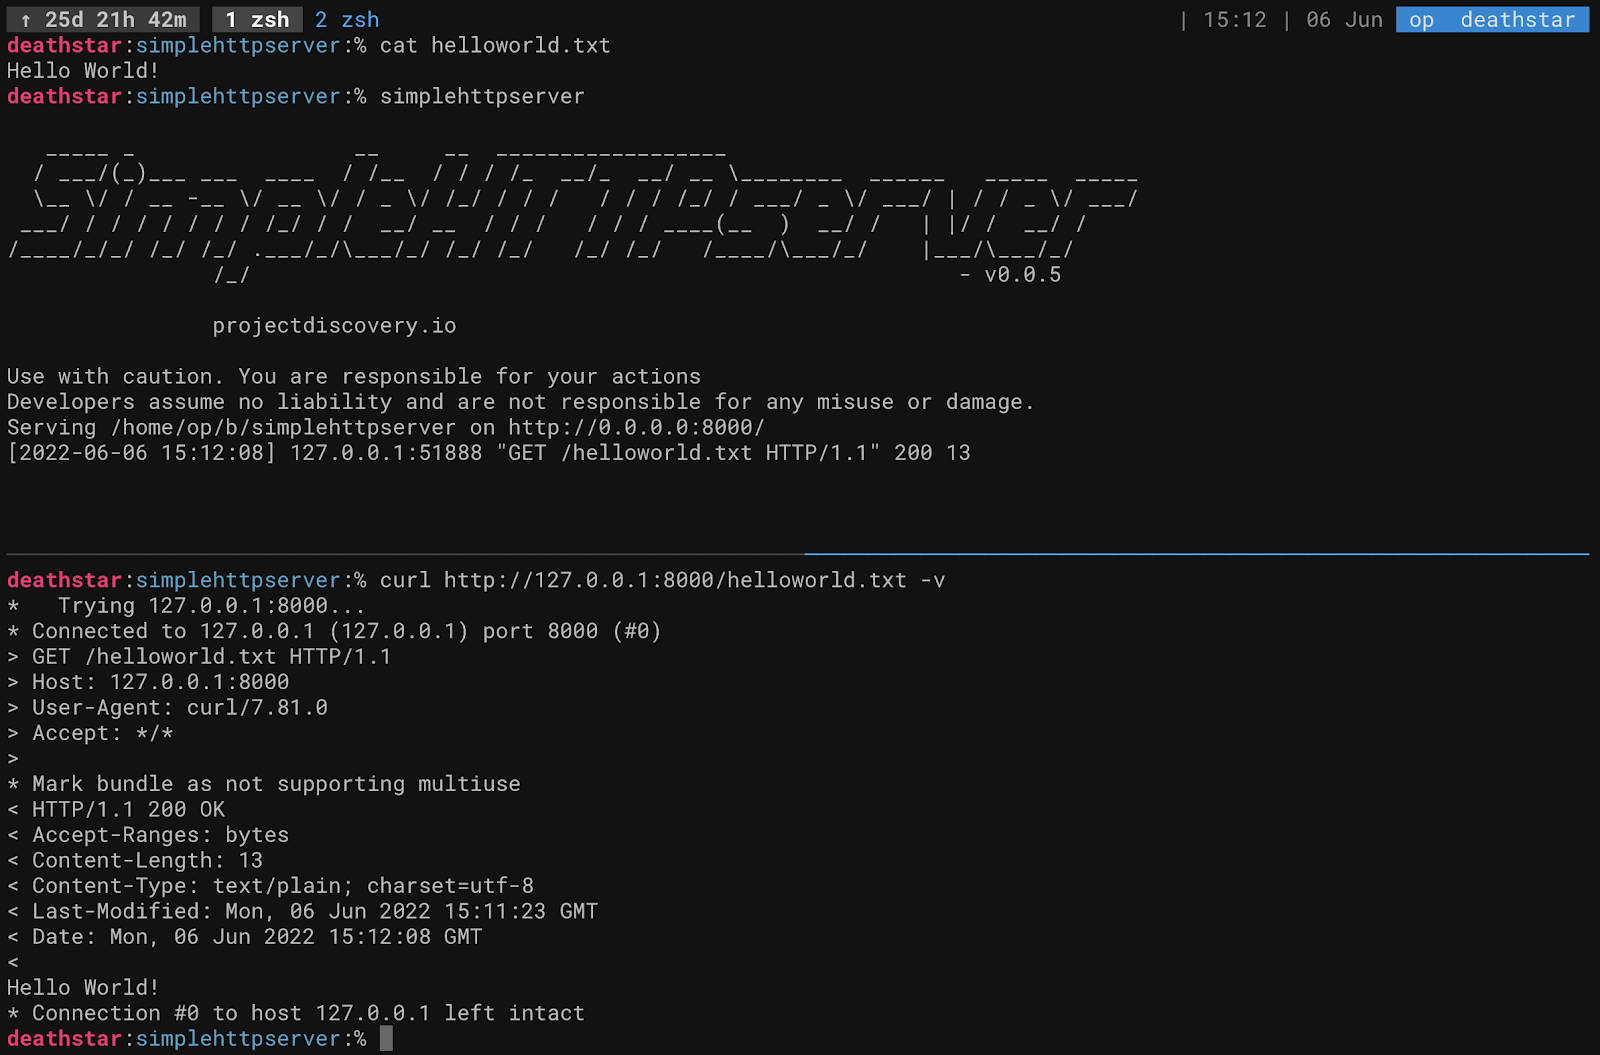
Simply run it in whatever directory you wish to share files, and it will start up a basic http server with directory listing enabled.simplehttpserver -path /home/op/b/simplehttpserver
In the example below, I have a plain text file called helloworld.txt, when I curl this, it gives me the content of the file! This would work for any file type, and it will address the content-type accordingly.
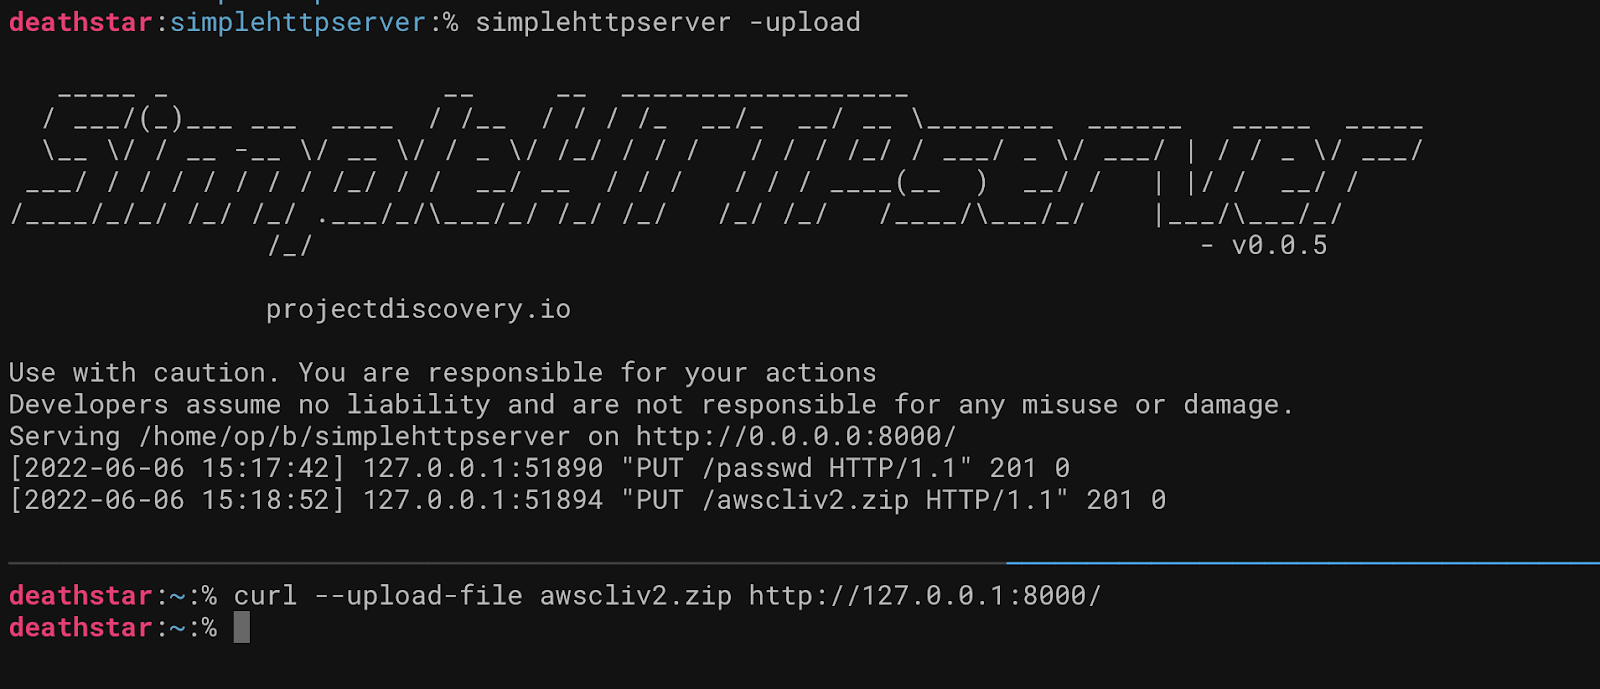
Uploads
It’s great being able to download files, but what about uploads? Most modern systems these days come with Curl preinstalled or some variation. This makes exfiltration of data easy!
# Start simplehttpserver with the upload flagsimplehttpserver -upload
|
# Upload the filecurl —upload-file file.zip http://127.0.0.1:8000
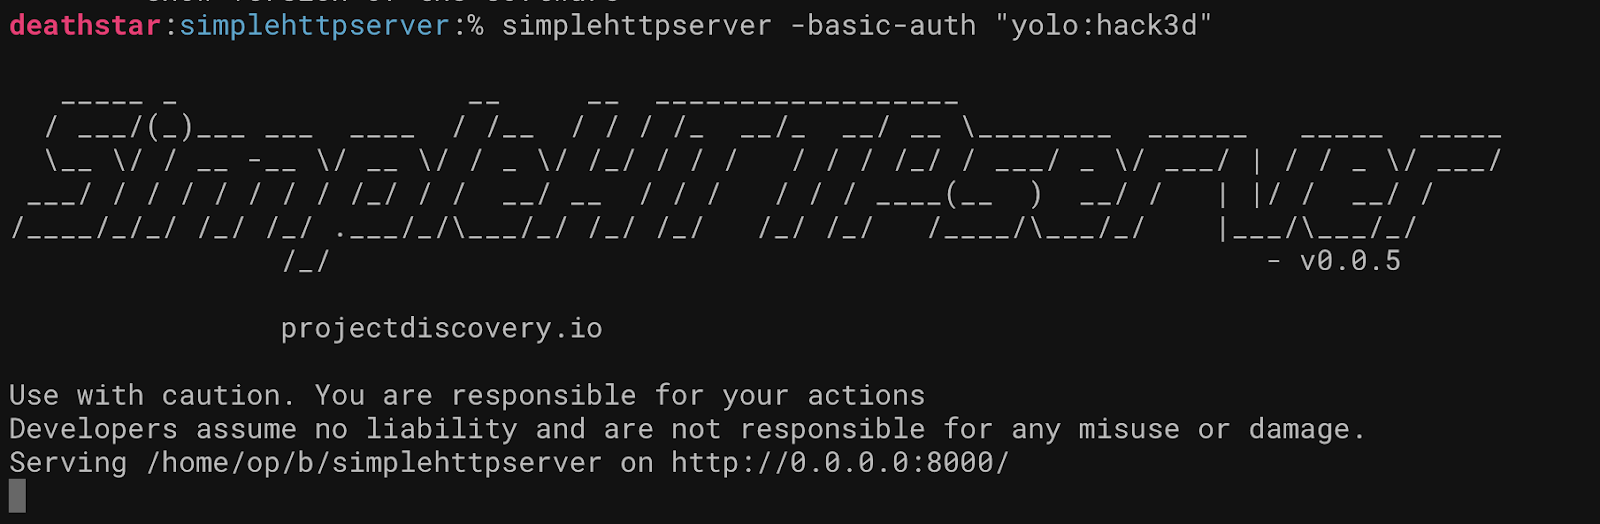
Basic Auth
There will likely come a time when you intend to expose this server to the internet, and whether you’re doing uploads or downloads of semi-sensitive data, it might make sense to implement authentication to keep those pesky hackers off your data.
Secure your server with HTTP Basic Authentication with:simplehttpserver -basic-auth "username:password"
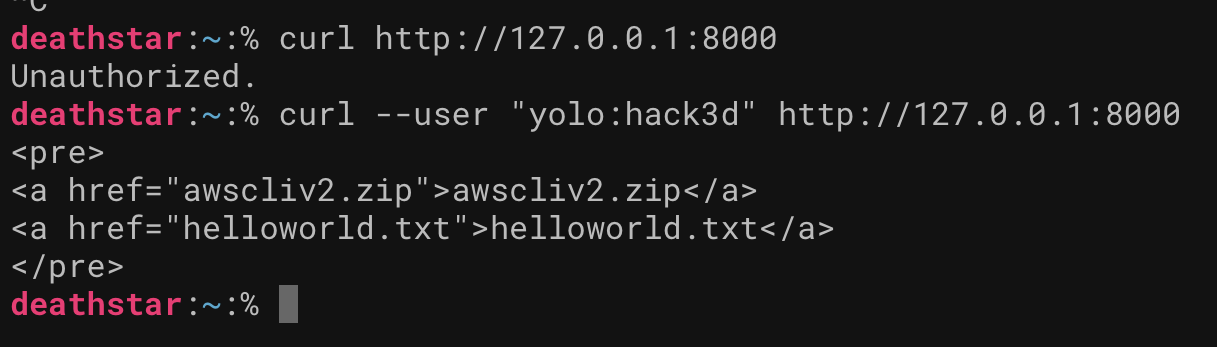
Now, you will notice if I try to access the page unauthenticated, it will deny me. If I visit this with a browser, the browser will present a prompt for the username and password.
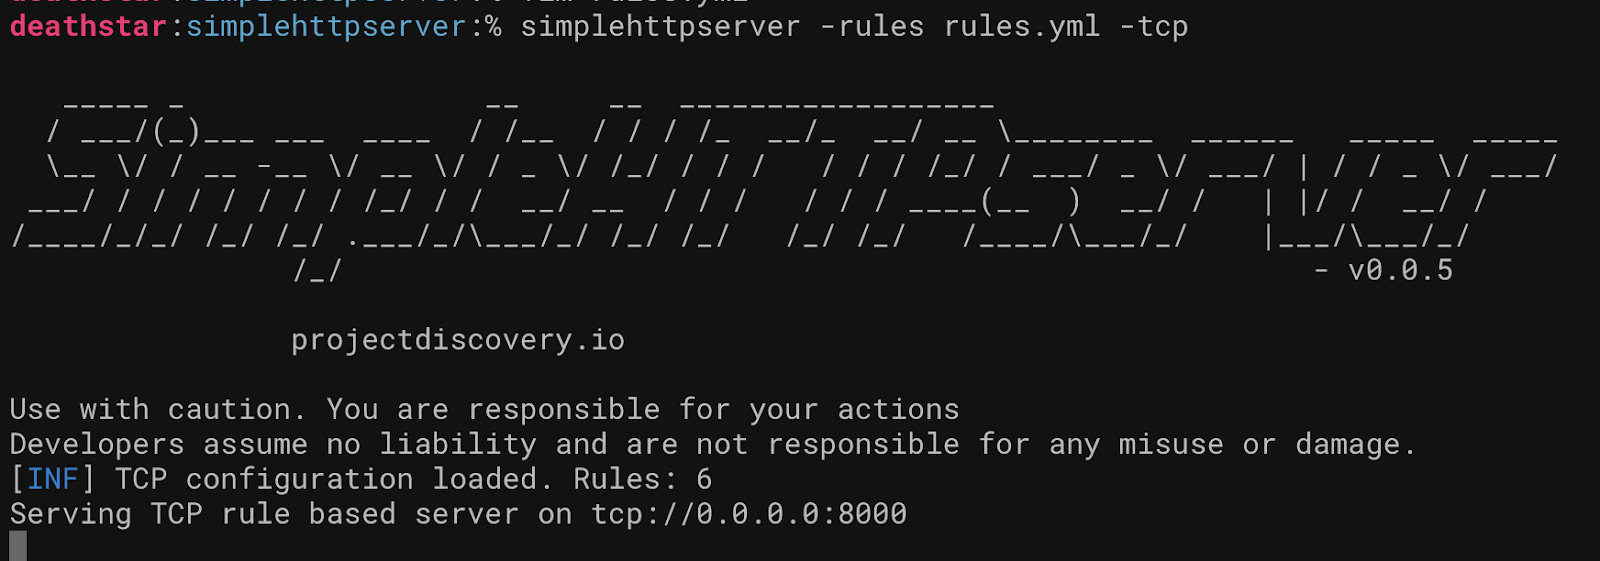
Simple TCP Server
This is the real power of this tool. Simplehttpserver with this functionality goes further than just a HTTP server, it becomes a full fledged TCP server with support for custom responses.
Using this, you can do anything from implementing a basic web server to a SMTP server or even a telnet server.
HTTP Server


Telnet Server
Maybe you want to do something a bit more fancy, maybe hide a flag for a CTF? Or implement a custom server for an IoT device you’re hacking?
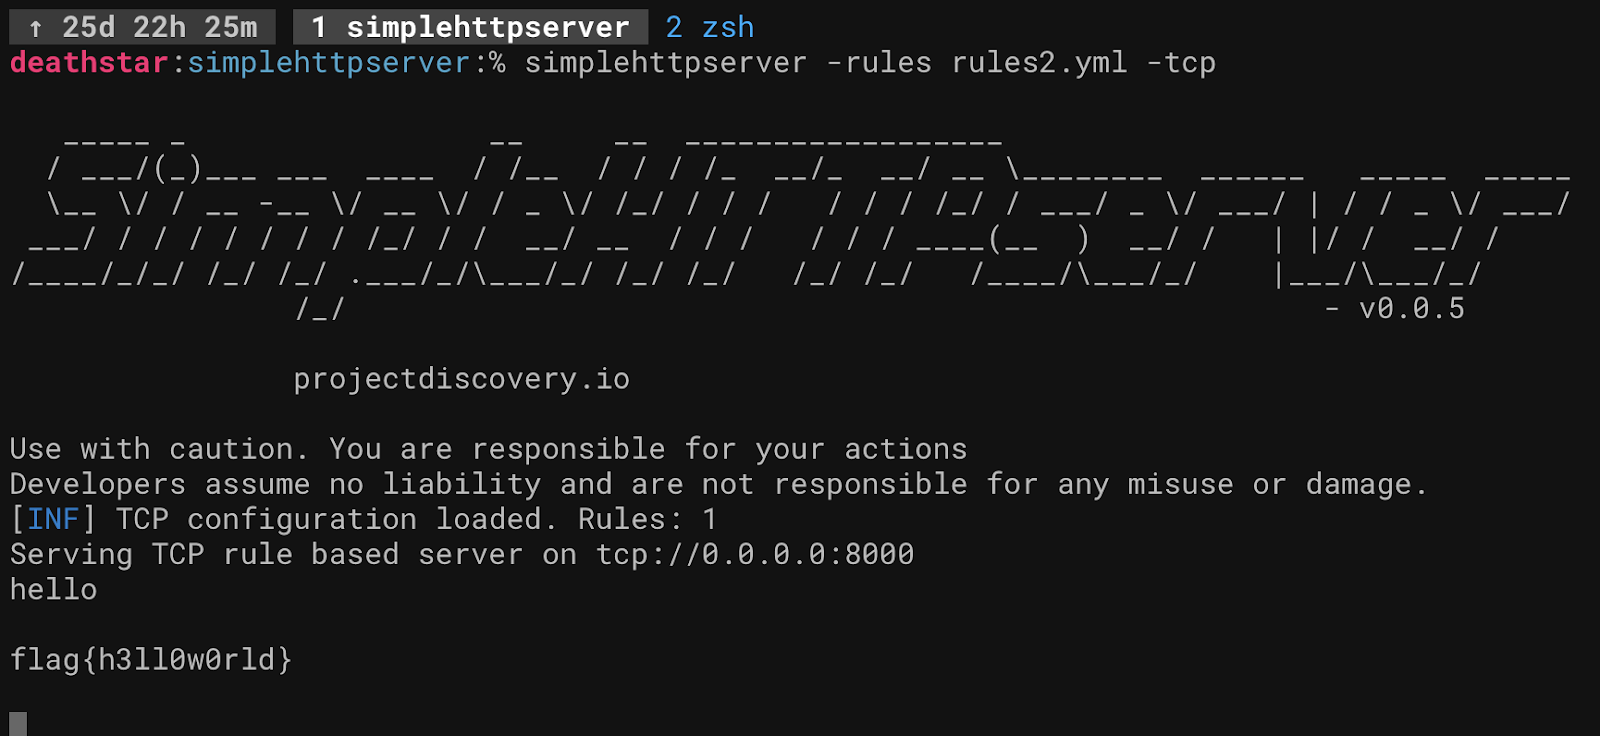

Simplehttpserver with the tcp flag can also be used to serve binary data for protocols such as ldap. Check out the docs here.
Uncover
Uncover is a handy tool for searching passive reconnaissance services such as Shodan, Censys and Fofa. It has a few handy flags such as the ability to search by company, and like all projectdiscovery tools, can be chained with many others for a quick reconnaissance workflow.
Installation
go install -v github.com/projectdiscovery/uncover/cmd/uncover@latest
First thing you’ll need to do is obtain your shodan API key. Place this key inside ~/.config/uncover/provider-config.yaml and you’re off to the races!
Specify your provider with the -e flag, for the sake of this blog article, I will only be using shodan, however, you can specify the providers as follows:uncover -q 'query' -e shodan,fofa,censys
Finding things on the internet
The traditional, fun way of using Shodan, is to utilize this tool to look for things of interest on the internet.
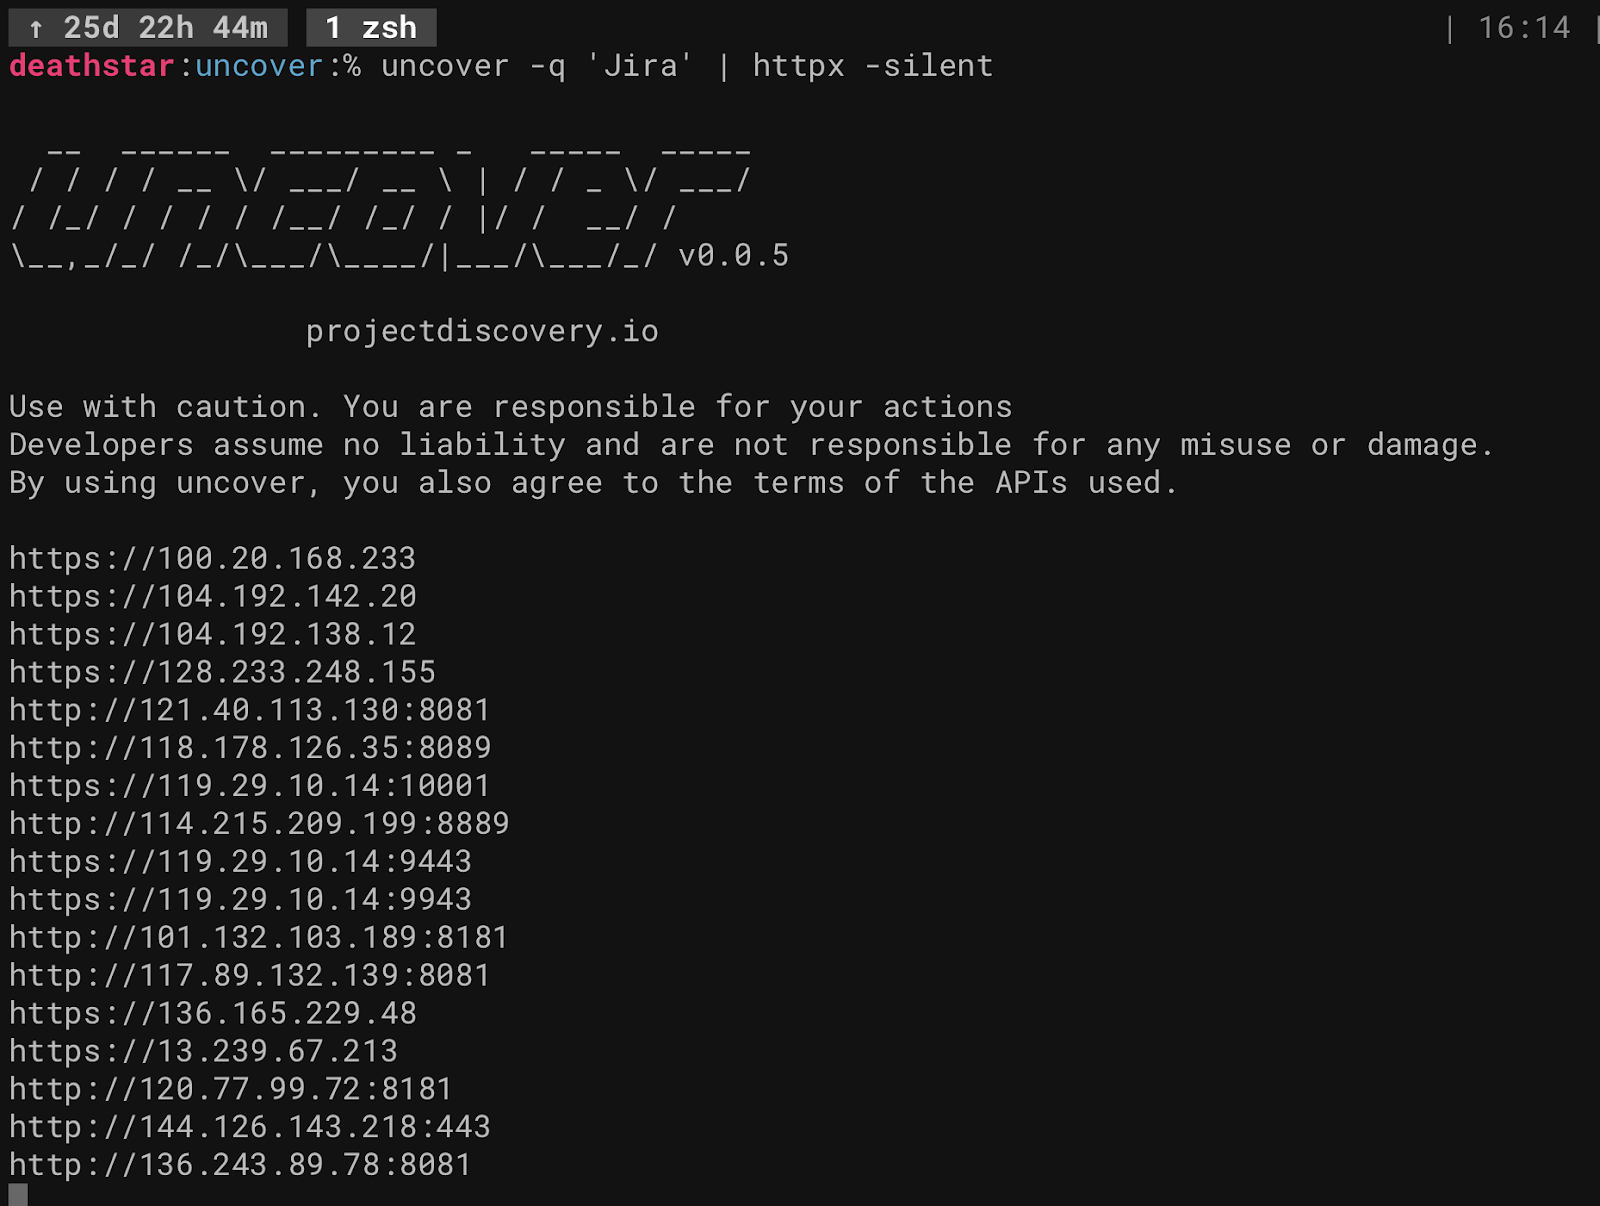
Uncover will create a list of IP addresses and ports, chaining this with httpx will give you a list of URLs present on those addresses. Pass this into Nuclei for some mass-scanning fun! uncover -q 'Jira'
uncover -q 'Jira' | httpx -silent
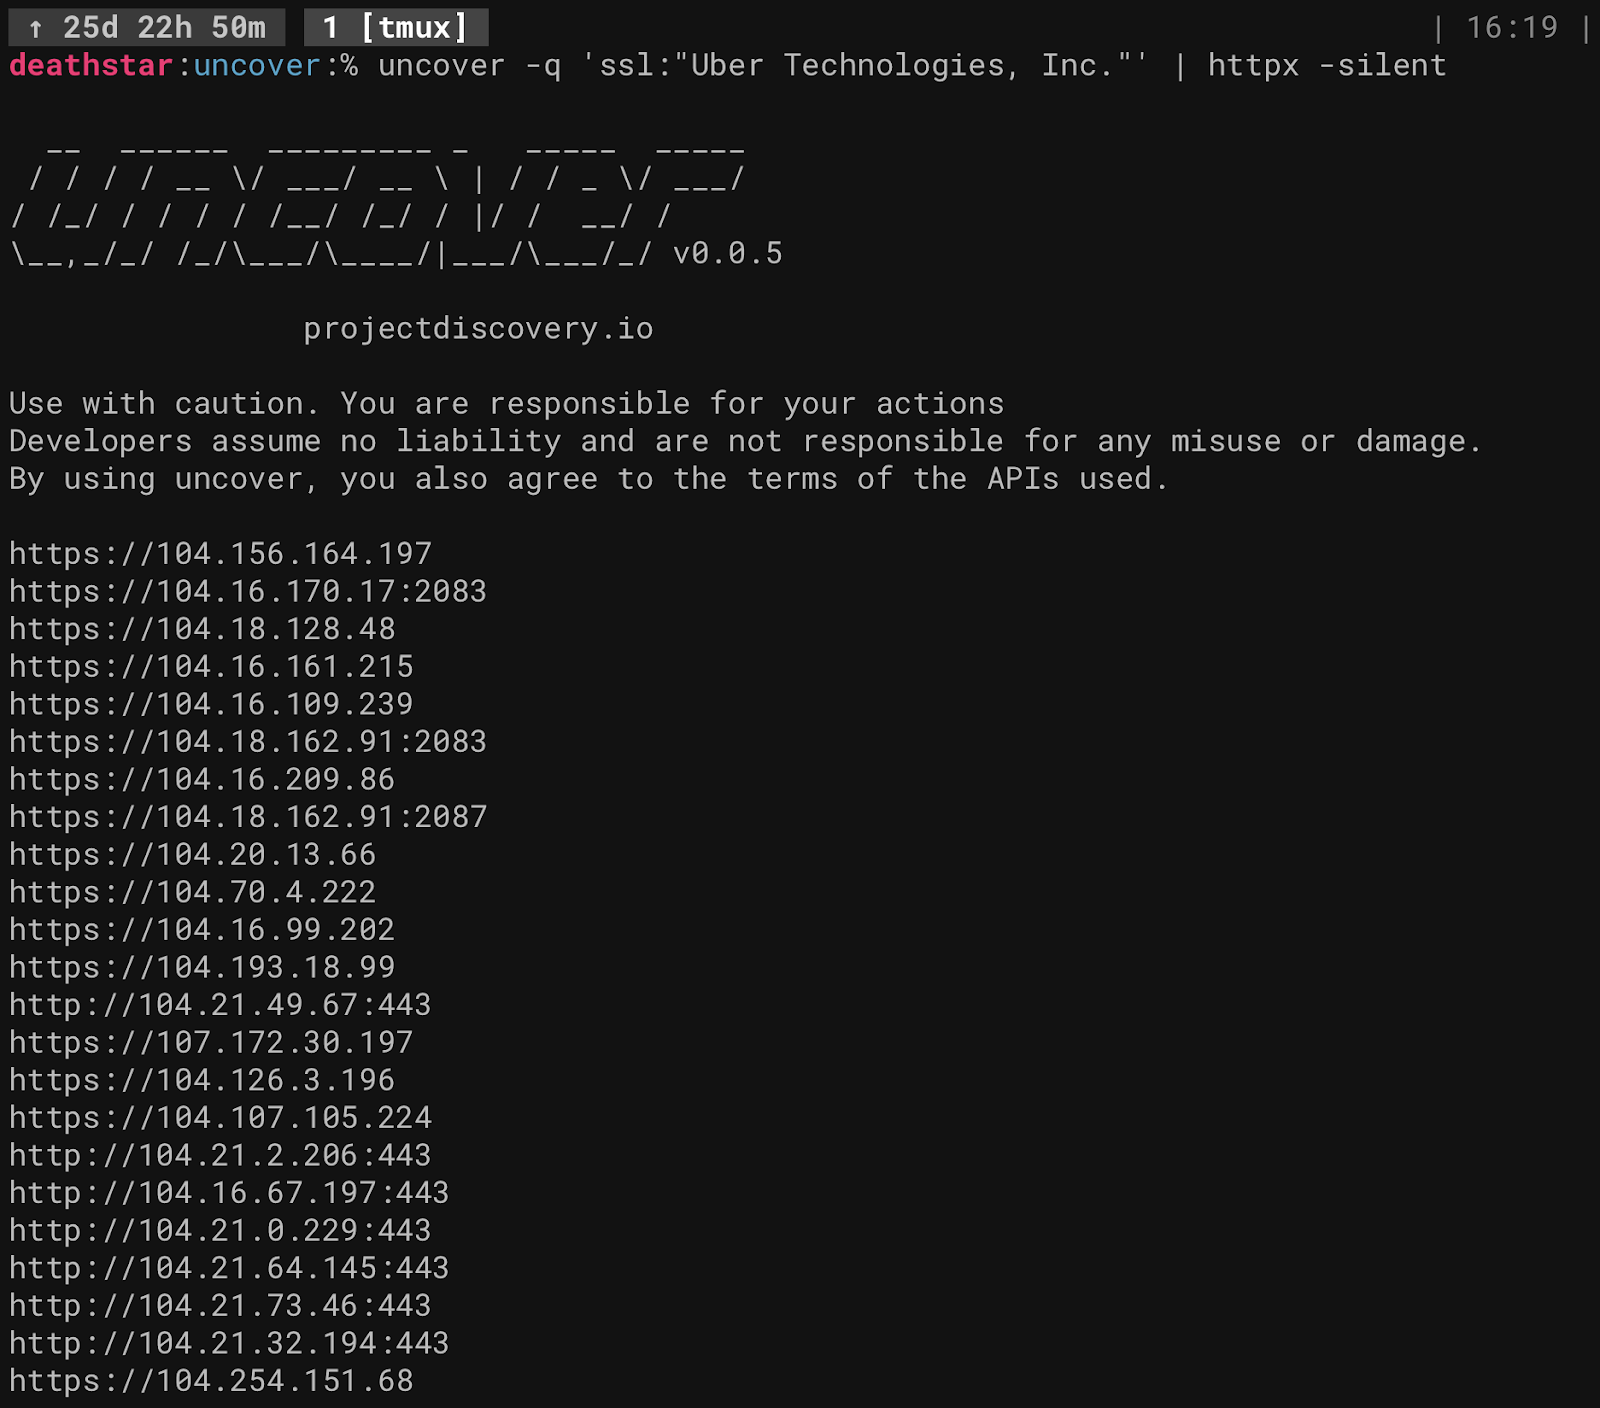
Filtering by company / using SSL
Since a lot of companies often use uniform SSL certificates with identifying properties such as common names, you can sometimes identify assets that have been forgotten about or don’t have an active DNS record.uncover -q 'ssl:"Uber Technologies, Inc."' | httpx -silent
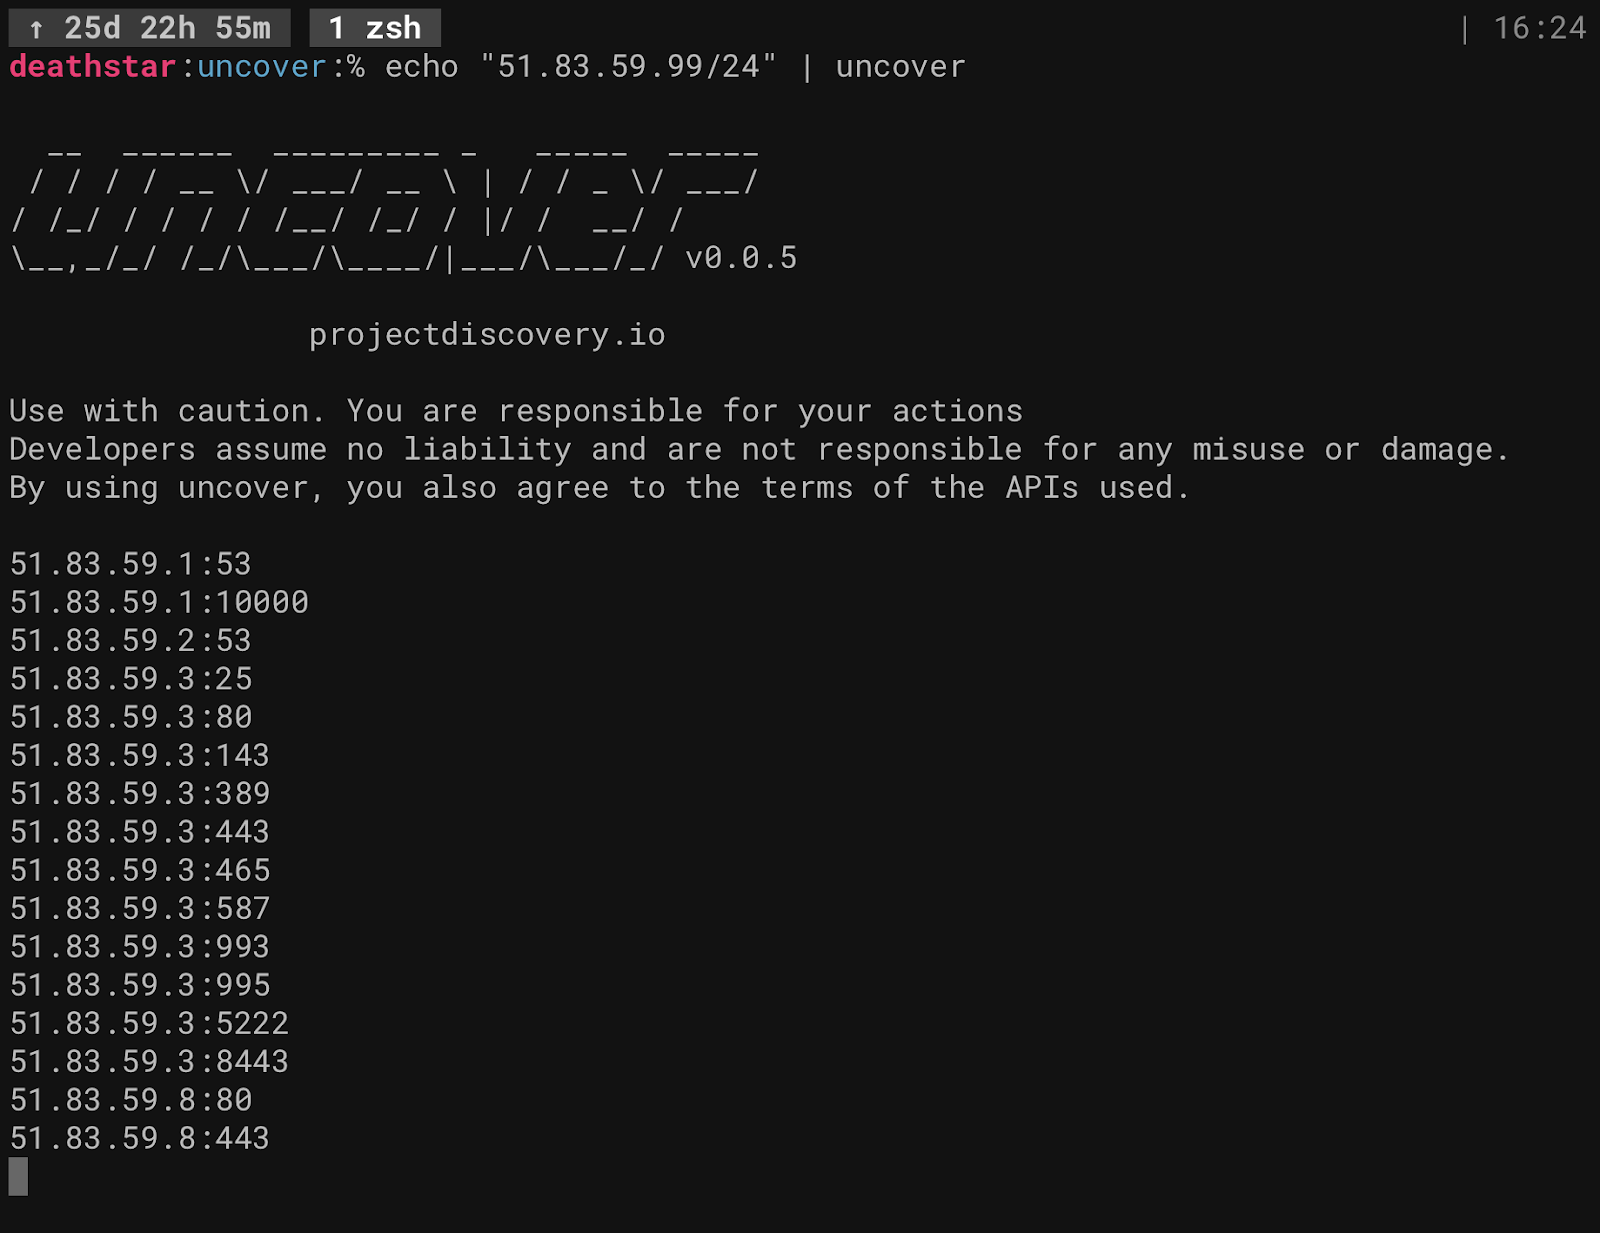
Shodan InternetDB for Passive Port Scanning
With the introduction of the Shodan InternetDB, passive port scanning is now a real thing.
echo "51.83.59.99/24" | uncover
If you want to get real fancy, you can do some cool stuff by chaining DNSX with subfinder.
This will enumerate domains, resolve the subdomains and passively port scan them, you can then pass this to httpx! subfinder -d company.com | dnsx -resp-only | uncover
Notify
Notify hooks into your provider of choice, be that Slack, Telegram, or Discord. Notify ensures that you never miss an alert and makes it easy to hook into your bash scripts.
Installation
go install -v github.com/projectdiscovery/notify/cmd/notify@latest
Configuration
To configure notify, edit the YAML configuration file at $HOME/.config/notify/config.yaml. Here is what an example configuration file looks like:
Usage
Using notify is as easy as piping the data you wish to be sent into notify.
Personally I love taking continuous loops and passing to notify using the anew tool by tomnonom. This will alert you with whatever providers you have configured by default with new DNS records that appear.subfinder -d example.com | dnsx -json | anew dns.json | notify
But it doesn’t stop there, by specifying an ID of a provider among several different providers, you can pick and choose where you receive notifications.
I use it in a way personally that I sent urgent notifications to Telegram, which is configured on my phone. This goes straight through to me and I get the notifications. For slack, I disable notifications but if I log into slack I can see if activity is taking place. It solves the differing levels of urgency which you can bake into your scripts.
Another way to use Notify is by using the -data flag. Instead of just piping a file, you can use -data to specify a file inline.
A good example is using a list of subdomains, otherwise you may receive a notification for every single newline. This can be annoying if you have notifications enabled.subfinder -d hackerone.com | notify -bulk -provider discord,slack
Using the -provider flag, you can specify multiple providers by their given ID’s in the configuration file.
Supported providers include:
- Slack, Discord, Telegram, Pushover, Email
Cloudlist
Cloudlist allows you to quickly pull an inventory of your cloud environments using your cloud keys.
Installation
go install -v github.com/projectdiscovery/cloudlist/cmd/cloudlist@latest
Once installed, you’ll want to configure cloudlist with your providers of choice by configuring the file located at ~/.config/cloudlist/provider-config.yaml
The simplest example would be by supplying DigitalOcean keys.
Usage
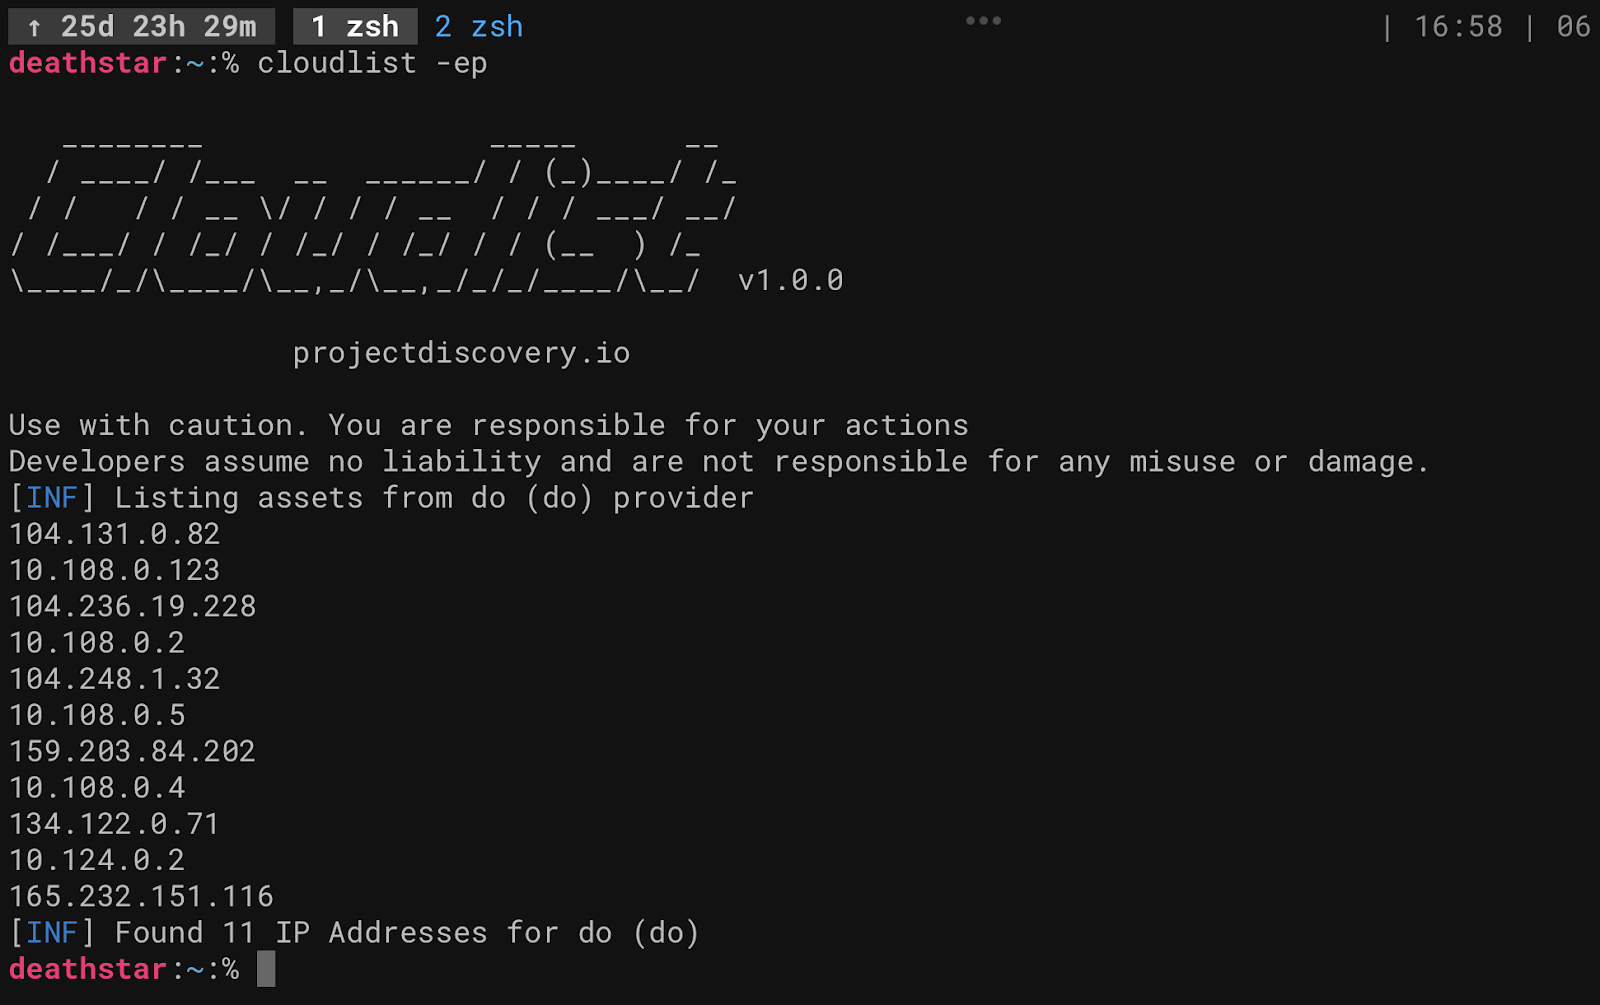
Once configured, usage is very simple, just run cloudlist and it will list all the assets in your account.
In the configuration file, you can specify the providers by ID, then you can specify the providers you wish to view assets for with the -providers flag.
For example:cloudlist -providers do,aws,gcp
This can be extremely useful for a Blue team, you can then chain this into a combo and an array of other tools for vulnerability scanning.cloudlist | httpx | nuclei
Cloudlist supports a wide array of different providers, including:
- AWS (Amazon web services)
- EC2
- Route53
- GCP (Google Cloud Platform)
- Cloud
- DO (DigitalOcean)
- Instances
- SCW (Scaleway)
- Instances
- Fastly
- Services
- Heroku
- Applications
- Linode
- Instances
- Azure
- Virtual Machines
- Namecheap
- Domain List
- Alibaba Cloud
- ECS Instances
- Cloudflare
- DNS
- Hashistack
- Nomad
- Consul
- Terraform
- Hetzner Cloud
- Instances
Conclusion
In conclusion, ProjectDiscovery has a wide array of tools far beyond their most popular offerings. By using these tools, you can gain a significant edge in your hacking workflow as well as make your life a lot easier. Every single tool mentioned in this article is written 100% in Golang and can be used on any OS that supports binaries; that includes, Windows, Mac, Linux.
If you found this article useful or you learned anything from this, please share so that other people can hopefully find something of value also!
- Ben Bidmead, @pry0cc