Security is a crucial factor for both small and large enterprises. This has led to the evolution of DevOps into DevSecOps, which integrates security at an internal level. As we have discussed in previous blogs, it is important to implement security within your DevOps cycle to ensure that it becomes DevSecOps. This approach introduces security at an early phase and helps mitigate multiple misconfigurations early on.
In this blog, we will explore how to use Nuclei, a powerful open-source tool for scanning web applications, in your Bitbucket CI/CD pipeline.
What's a Bitbucket CI/CD?
Bitbucket is a web-based Git repository hosting service that is primarily used for source code management (SCM) and version control, just like GitHub and GitLab. It allows developers to collaborate on code and track changes, making it easier to manage and maintain codebases. Bitbucket supports both Git and Mercurial version control systems and offers features such as pull requests, code reviews, and continuous integration and delivery (CI/CD).
Bitbucket pipelines uses a file called bitbucket-pipelines.yml to define the CI/CD pipeline, consisting of a series of jobs and stages executed in a specific order. Each job defines a specific task, such as building an application, running tests, or deploying code to a production environment.
The bitbucket-pipelines.yml file is written in YAML format and is located at the root of the project repository. It contains information about the environment and the tools required to build, test, and deploy the project. The file also defines the steps that need to be taken in the pipeline to build, test, and deploy the application.
In Bitbucket Pipelines, the bitbucket-pipelines.yml file is automatically detected and executed when changes are pushed to the repository. This allows for the automatic testing and deployment of code changes, streamlining the development process and ensuring that any issues are caught early in the process.
Nuclei - A fast & customizable vulnerability scanner
Nuclei is an open-source tool for scanning vulnerabilities with the help of pre-defined templates written in YAML. It can scan any vulnerability class, including cross-site scripting (XSS), SQL injection, and remote command execution. Nuclei are fast and efficient, making them a powerful tool for identifying potential application vulnerabilities.
It can be set up to run in an internal network environment for local and publicly deployed applications.
Power of Nuclei
One of the key benefits of Nuclei is its ability to scan a wide range of vulnerabilities quickly and accurately. It uses pre-defined templates, called "rules," to scan for known vulnerabilities, and it can also be customized to scan for specific vulnerabilities or issues. This makes it an ideal tool for identifying potential vulnerabilities in your web applications.
Now, let’s jump back to the original discussion and understand how to integrate nuclei in your CI/CD pipeline.
Integrating Nuclei in Bitbucket CI/CD pipeline
Integrating the nuclei scanning capabilities into your CI/CD pipeline is quite straightforward. We will create a private repository on Bitbucket and assume it hosts code for an application, say https://harshbothra.tech
Follow the below steps to set up a CI/CD pipeline in Bitbucket and run a workflow to launch Nuclei Scan on https://harshbothra.tech with every code change.
- Navigate to Bitbucket Web Application at https://bitbucket.org/ and log in with your account.
- Click on the “Create” button and select the “Repository” option.

4. Now, click on the “Pipelines” sections and click on “Create your first pipeline”.
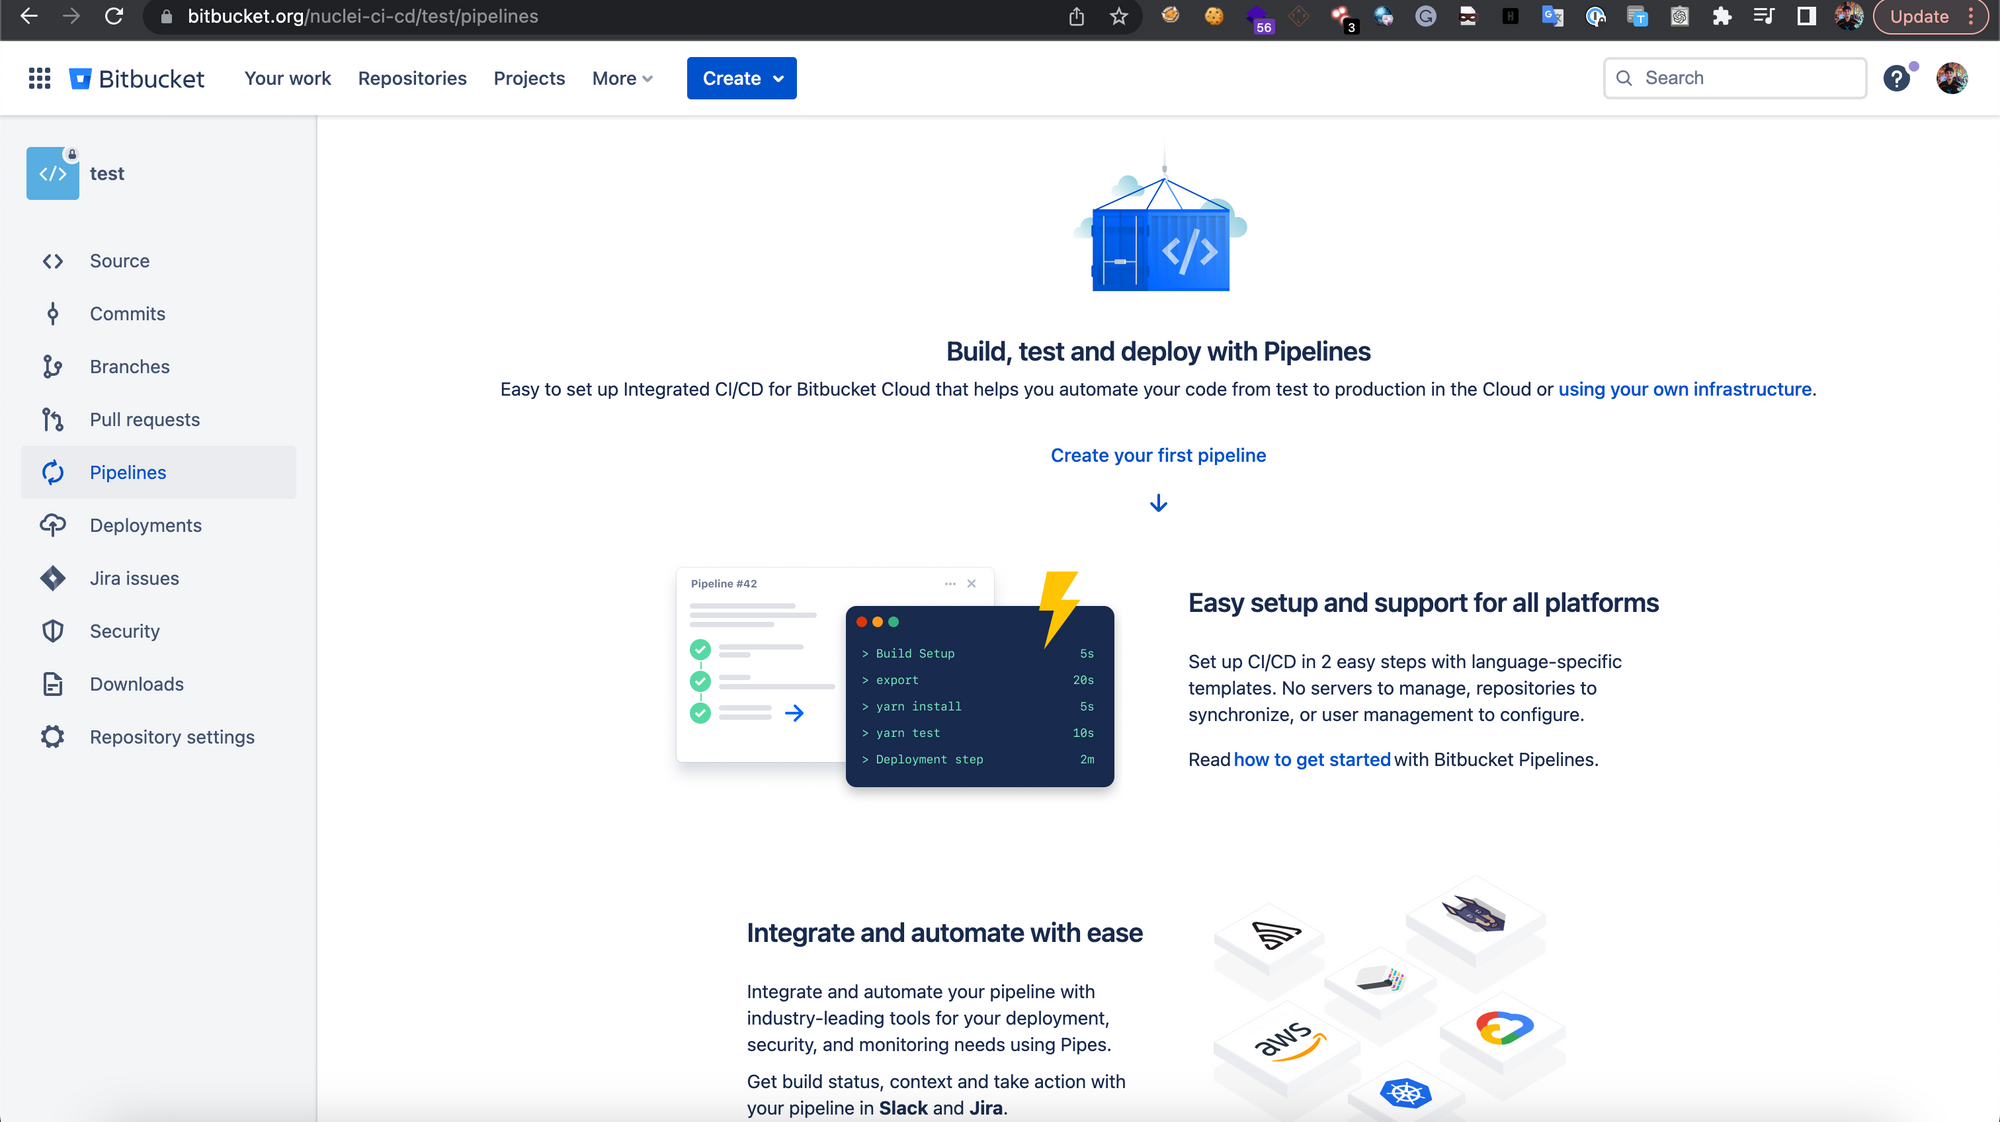
5. Select the “Starter Pipeline”

6. Now, add the following code in the bitbucket-pipelines.yml file.
image: golang:1.20

pipelines:
  default:
    - step:
        name: Run Nuclei Scan on https://harshbothra.tech
        script:
          # Install Nuclei using Go
          - go install github.com/projectdiscovery/nuclei/v2/cmd/nuclei@latest

          # Run the Nuclei scan
          - nuclei -u https://harshbothra.tech -o scan_output.txt

          # Display the results
          - cat scan_output.txt
Explanation of the code: This code will first install nuclei using go language and later run the nuclei nuclei scan on https://harshbothra.tech. Further, using the -o flag with the nuclei tool, it will create a file named scan_output.txt and at last it will display the result of the scan.
- Change the
-uparameter with your application URL in the above code. It also supports multiple URLs. You can use specific nuclei commands as it will work similarly to how you run nuclei in your command line. A detailed guide on nuclei can be found here: https://github.com/projectdiscovery/nuclei - Now, save your code and observe that the pipeline will start executing. Simply click on Pipelines and select your running pipeline to see the results.

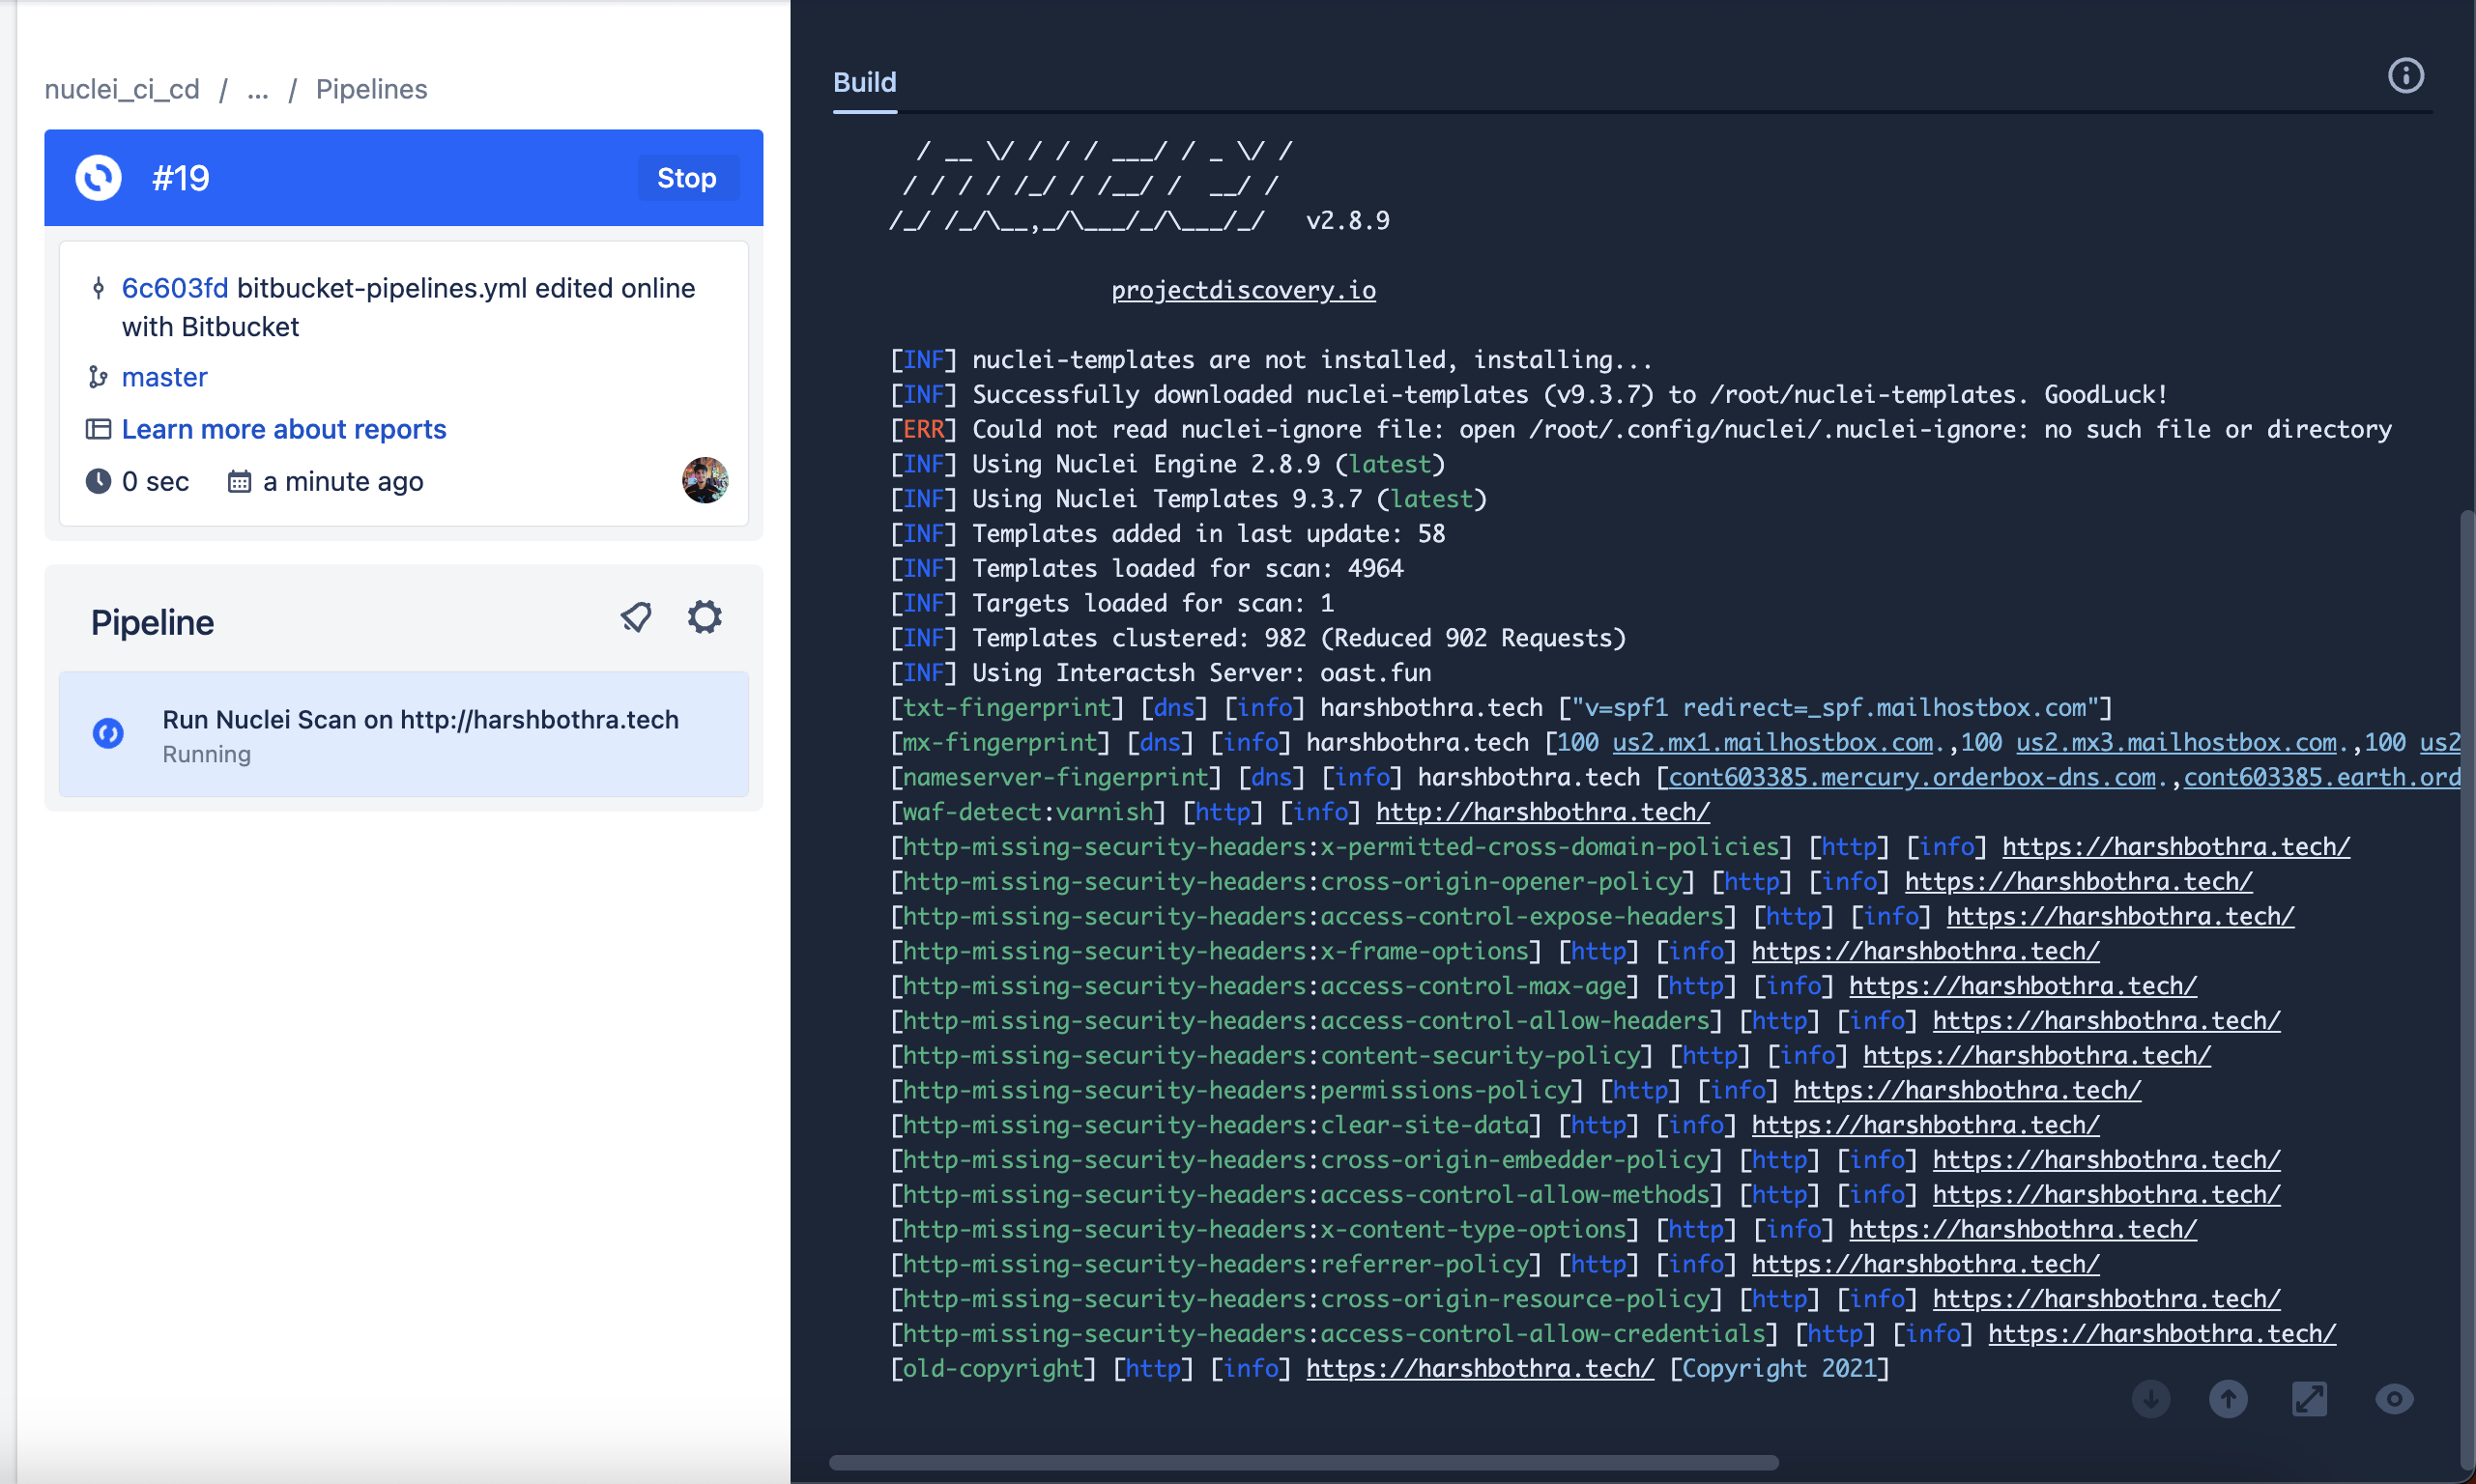
This is how you run nuclei on your web application on every code push using a Bitbucket CI/CD pipeline.
Now, let’s take this one step further and discuss how you can use the nuclei for regression testing using the Bitbucket CI/CD pipeline as we did for the GitHub CI/CD pipeline. In case you missed our previous blog on how to implement nuclei in the GitHub CI/CD pipeline, read it here: https://blog.projectdiscovery.io/implementing-nuclei-into-your-github-ci-cd-for-scanning-live-web-applications/
Performing regression testing with Nuclei custom templates
Keeping track of known vulnerabilities and ensuring that they are properly remediated is an essential task for any organization. With the constant evolution of technology and the frequent release of new code, it is crucial to perform regular regression testing to ensure that vulnerabilities are not reintroduced. However, this can be a tedious and resource-intensive task that can impact release schedules.
Fortunately, there is a solution that can streamline this process and make it more efficient. Nuclei is a powerful tool that allows organizations to perform regression testing using custom templates. By writing templates that specifically target known vulnerabilities, organizations can easily scan their code for any potential issues.
The process of writing templates for Nuclei is straightforward and user-friendly. Nuclei provides a comprehensive guide on its website that walks users through the process of creating templates. This guide can be found at https://nuclei.projectdiscovery.io/templating-guide/.
Let's dive into how custom templates can be utilized in the CI/CD pipeline to perform regression testing. By incorporating custom template scanning into your workflow, you can easily scan for known vulnerabilities and ensure that they are properly remediated with every code change.
To implement this feature, simply replace the code in your workflow file with the following instructions:
image: golang:1.20

pipelines:
  default:
    - step:
        name: Run Nuclei Scan on https://harshbothra.tech
        script:
          # Install Nuclei using Go
          - go install github.com/projectdiscovery/nuclei/v2/cmd/nuclei@latest

          # Run the Nuclei scan
          - nuclei -u https://harshbothra.tech -t <path_to_templates> -o scan_output.txt

          # Display the results
          - cat scan_output.txt
You can also use the -tu flag instead of -t that fetches templates from a URL which is easier in case of CI/CD pipeline.
Automatic issue reporting to Jira issue tracker using Nuclei scan results
Once Nuclei has completed its scan, it is important to report any identified issues and notify the relevant parties. This can be done using a tool like Jira issue tracker with Bitbucket, which allows you to create and track issues efficiently.
First of all, we will need to create a report configuration file to feed nuclei for automatic issue reporting.
report.yaml
jira:
  cloud: true
  update-existing: false
  url: https://<>
  account-id: <>
  email: <>
  token: ATA<>
  project-name: TES
  issue-type: Bug
  severity-as-label: true
In the above report.yaml file, change the url, account-id, email token, project-name with your values. Next, we will convert this file (report.yaml) to a base64 string so that we can set it as a variable that can easily be called in our CI/CD pipeline.
Step: Converting report.yaml to base64
Command: cat report.yaml | base64
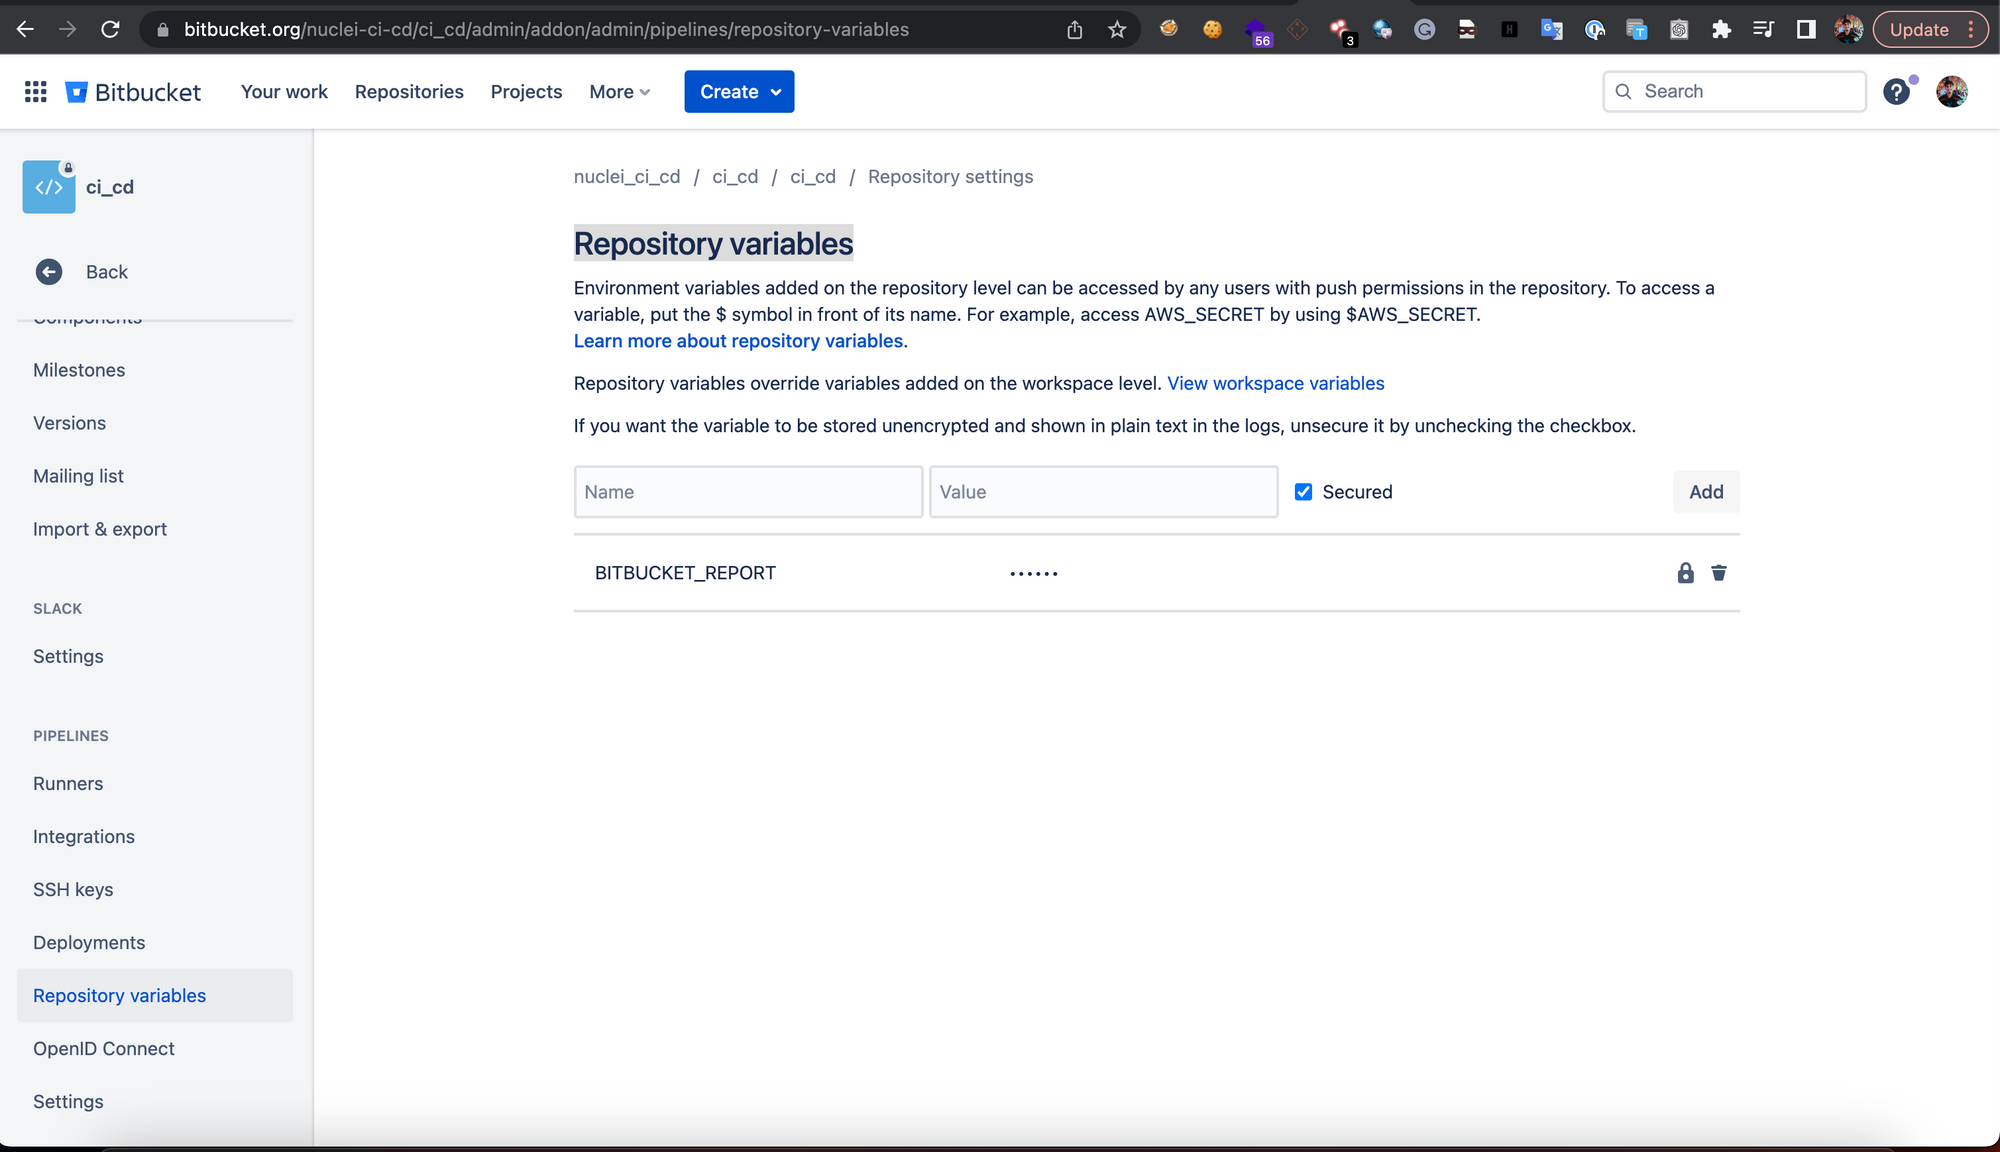
Next, we will set up a Bitbucket Repository variable using the above base64 string. You can find documentation to setup a Repository variable here: https://support.atlassian.com/bitbucket-cloud/docs/variables-and-secrets/
Step: Setting up Bitbucket repository variable
- Navigate to your Repository > Repository settings and under pipelines section, select “Repository variables”
2. Add your Variable Name and Value and click on “Add” to successfully set up a variable.
Now, we have done all prerequisite steps, next, let’s re-create our CI/CD configuration file to implement automatic issue reporting.
In the above workflow file, replace the code with the following:
image: golang:1.20

pipelines:
  default:
    - step:
        name: Run Nuclei Scan on http://harshbothra.tech
        script:
          # Install Nuclei using Go
          - go install github.com/projectdiscovery/nuclei/v2/cmd/nuclei@latest

          # Run the Nuclei scan
          - echo $BITBUCKET_REPORT | base64 -d > report.yaml
          - nuclei -u http://harshbothra.tech -rc report.yaml
Explanation of the code: In the above code, the script will read the CI/CD variable and re-create the report.yaml file which will further be fed to nuclei using -rc (report config) parameter. The rest script is similar to what we previously used but now it is more powerful as it will perform automatic issue creation on Jira.
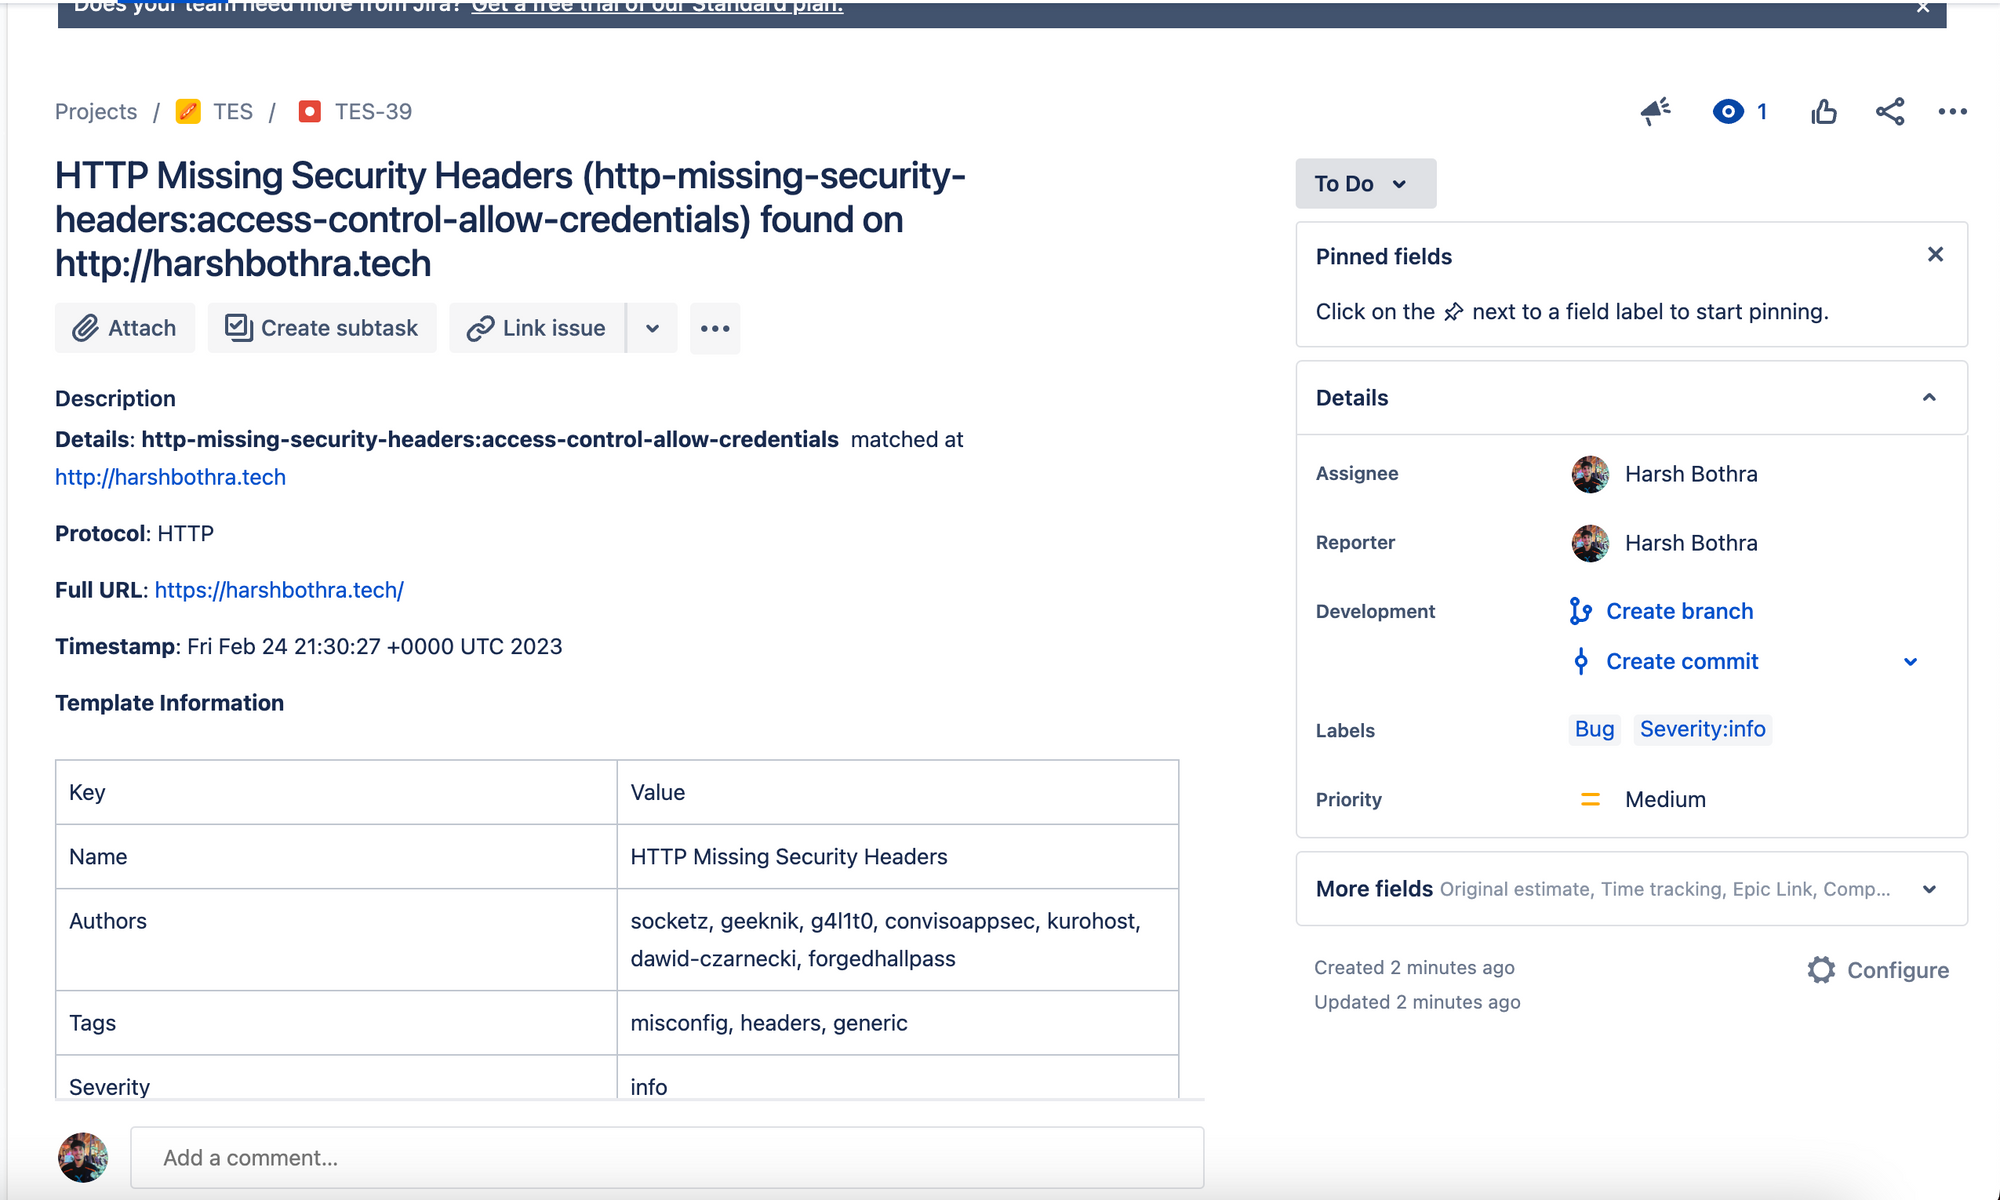
Now, commit the new changes, and you should see it will start a new workflow process, and at the end, it will report the issues. The reported issues can be found in your project’s Issues tab.

Conclusion
Nuclei is an invaluable resource for anyone looking to ensure the security and stability of their web applications. Not only is it a powerful tool for identifying vulnerabilities, it is also open-source and easy to integrate into your Bitbucket CI/CD pipeline. It's important to remember that once you have identified any issues with Nuclei, you should notify the relevant parties so that they can be properly addressed. This will help to protect your web applications and the sensitive information they contain. Happy hacking!