Some of the most popular tools by ProjectDiscovery are Nuclei (template-based vulnerability scanner), HTTPx (multipurpose HTTP toolkit), and Subfinder (subdomain enumeration and discovery tool). While the installation process is typically very straightforward for ProjectDiscovery tools, one can often encounter some difficulty setting up a proper environment to run the tool, especially when performing an assessment on a temporary VPS or client-provided system.
In instances like this, running tools in Docker makes sense. Docker is a popular platform that simplifies application deployment and management by containerizing everything. By running ProjectDiscovery tools within Docker, one can streamline setup processes and enhance tool portability.
By the time you've finished reading this article, you'll be able to run ProjectDiscovery tools within Docker!
Before we dive into it, we'll need to set up Docker. Onward! 🐳
Setting up Docker
Docker reduces the "it works on my machine" problem. By packaging an application with its runtime environment, Docker ensures consistent behavior across different machines. This is especially useful for hackers who want to run tools without fiddling with their local environment.
Docker is available for all the major operating systems, including Windows, Linux and Mac. One can install Docker’s command line or the Desktop (user interface) version based on their preferences. A detailed guide on installing Docker can be found here.
Once you have installed Docker, confirm if Docker is successfully up and running with docker --version :

A detailed guide on Docker CLI commands and their usage can be found here. Now that we have Docker up and running, let’s set it up to run ProjectDiscovery tools.
Installing & Running ProjectDiscovery Tools with Docker
The Docker container for most ProjectDiscovery tools is pre-built for you. This article will look at some of the most popular tools like Nuclei, Subfinder & HTTPX.
Nuclei
Installing Nuclei using Docker
- Run
docker pull projectdiscovery/nuclei:latestto install Nuclei using Docker:

2. Observe that the Nuclei image has been downloaded successfully.
3. Run docker image ls to view the image.

Running Nuclei using Docker
- After downloading the image, the next step is to run the tool using
docker run projectdiscovery/nuclei:latest --version - Observe that the tool successfully returned a valid version.

3. Now, to run a scan using Nuclei, run docker run projectdiscovery/nuclei:latest -u <target_url>.
4. Observe that the Nuclei scan was successfully started on the target URL.

Similarly, one can run any Nuclei command, and the full guide on various nuclei commands can be found here.
Subfinder
Installing Subfinder using Docker
- Run
docker pull projectdiscovery/subfinder:latestto install Subfinder using Docker. - Observe that the Subfinder image has been downloaded successfully.

3. Run docker image ls to view the image.

Running Subfinder using Docker
- After downloading the image, the next step is to run the tool using
docker run projectdiscovery/subfinder:latest --version. - Observe that the tool successfully returned a valid version.

3. Now, to run a scan using Subfinder, run docker run projectdiscovery/subfinder:latest -d <target_url>.
4. Observe that the Subfinder scan was successfully started on the target URL.

Similarly, one can run any Subfinder command, and the full guide on various subfinder commands can be found here.
HTTPX
Installing HTTPX using Docker
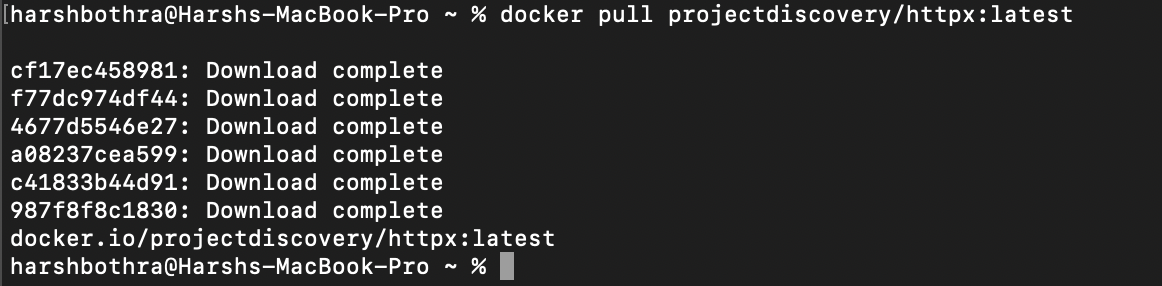
- Run
docker pull projectdiscovery/httpx:latestto install HTTPX using Docker. - Observe that the HTTPX image has been downloaded successfully.
3. Run docker image ls to view the image.

Running HTTPX using Docker
- After downloading the image, the next step is to run the tool using
docker run projectdiscovery/httpx:latest --version. - Observe that the tool successfully returned a valid version.

3. Now, to run a scan using HTTPX, run cat subdomains.txt | docker run -i projectdiscovery/httpx:latest.
4. Observe that the HTTPX scan was successfully started on the target URL.

Similarly, one can run any HTTPX command; the full guide on various HTTPx commands can be found here.
Input & Output between Docker & Host system
One of the key challenges while running docker is to input a file from the host system to the Docker container and, similarly, output the results from the container to store in the host system. To overcome this challenge, we will use the mounting volumes supported by docker and allow the container to access the specified directory with the container bi-directionally, i.e. you can read (input) and write (output) data between the host system and docker container.
Let’s look at the process by following the below-mentioned steps for the Nuclei container:
- Create a directory (you can use an existing directory) in the host system that you want to use for input and output.
- Create a nuclei template file or target list in the directory.
- Next, mount the directory to the docker container using
docker run -v /path/to/dir:/<container_dir> <image_name> <command>.
Example:
docker run -v $(pwd):/app/template projectdiscovery/nuclei:latest -u http://testphp.vulnweb.com/ -t /app/template/custom.yaml -v4. Observe that the template created on the host system directory was used.

5. Now, run docker run -v /path/to/output:<container_dir> <image_name> to store the output file on the host directory.
Example:
docker run -v $(pwd):/app/template projectdiscovery/nuclei:latest -u http://testphp.vulnweb.com/ -t /app/template/custom.yaml -v -o /app/template/scan.txt6. Observe that the scan.txt file was created in the docker_demo directory in the host system.

Building locally with Dockerfile
Dockerfile is a text document that allows Docker to build images automatically by reading the instructions present in the file. It contains all the commands a user would generally use on the command like to make the image work. You can find more general information on Dockerfile here.
We will see how you can efficiently utilize the Dockerfile provided with each ProjectDiscovery tool to run the build locally.
Let’s understand the process with an example of Subfinder:
- Download or clone the Subfinder’s GitHub repository on your local system.
- Navigate to the Subfinder root directory and observe the Dockerfile is present with the following content:

3. Run docker build -t “<image_name>:Dockerfile” to build the image using Dockerfile.
4. Observe the build process started successfully.

5. Once the build process completes, run docker image ls to verify if the image is present.

6. To use the newly built image, run docker run <image_name>:<tag> <command>.

The process for running other ProjectDiscovery tools is much the same. "Using these tools in Docker will save you the hassle of configuring your local environment. For example, this is especially handy when performing a security assessment on a client's remote machine or switching your machines at frequent intervals.
Conclusion
If you've been holding off on trying Docker - now's the best time to pull the trigger. If you are installing tools frequently on unfamiliar systems, you'll absolutely love the improved workflow and environment separation! Docker will simplify your setup and deployment process, leaving you to focus on the hacking.
If you're interested in using Docker beyond the scope of this blog, the best place to start is the "Getting Started" section of the Docker documentation. See you next time!
Author - Harsh Bothra (@harshbothra_)